Hair knowledge
Best Sew-In Weave Techniques You Should Know
Over time, sew-ins have become one of the most versatile and dynamic methods for installing hair extensions, allowing women to enhance and transform their look with ease.
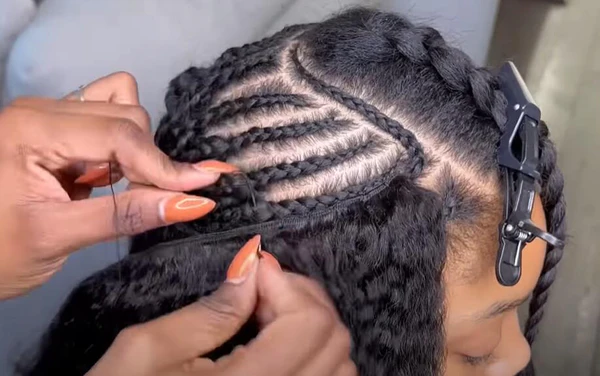
The sew-in process involves attaching hair extensions along the wefts or tracks using a thread and needle. 🧵
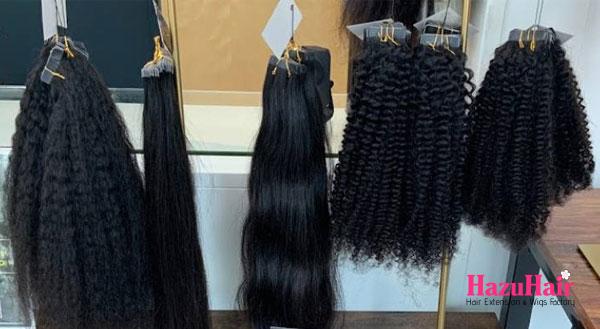
Once you’ve decided that sew-ins are your preferred installation method, selecting the right type of hair for your look is essential.
Proper preparation is key to achieving long-lasting, successful sew-ins.
What You’ll Discover about Sew-Ins:
- Introduction to Sew-Ins
- Essential Supplies for Sew-Ins
- Preparing Your Hair for Installation
- Stitching Techniques for a Secure Sew-In
- Full Sew-In Method
- Vixen Sew-In Method
- Partial Sew-In Method
- Invisible Part Sew-In
- Tips and Discussion
Never Face a Bad Install with These Sew-In Techniques
Everyone’s talking about securing the bag – but what about securing your sew-in? Proper installation makes all the difference for achieving a flawless look.
Investing in quality human hair extensions, like those from Private Label Extensions, is only part of the equation; installing them correctly is the key to making the most of your extensions.
No one wants visible tracks, poor leave-out blending, or a sew-in that seems barely attached because of a weak foundation.
So, before you step out to secure that bag, ensure your sew-in is on point! With a perfect install, you’ll turn heads the moment you enter the room.
This guide covers everything you’ll need to achieve a perfect sew-in from start to finish – just in time for the holidays!
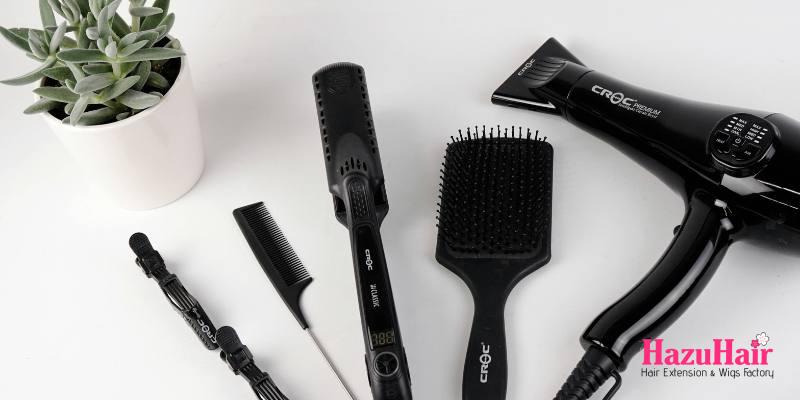
1. Essentials for a Sew-In Installation:
- Rat-Tail Comb – For precise parting
- Wide-Tooth Comb – To gently detangle
- Scalp Oil – To nourish the scalp
- Black Nylon Thread – For secure stitching
- Small Rubber Bands – For sectioning
- Hook Needle – For sewing the extensions
- Duckbill Clips – For keeping sections in place
- Weaving Net – To create a sturdy base
- Wig Cap (optional, depending on technique)
- Flat Iron – To blend natural and extension hair
- Three Bundles of Hair (shampooed, deep-conditioned, and fully dried)
- 1 Pack of Synthetic Braid Hair (optional)
2. Prepping Your Hair Before the Install
Never begin a sew-in without prepping your hair—it’s crucial for achieving a lasting, flawless installation. Just think: your hair will be under extensions for a while, so preparing it properly helps prevent buildup, odors, and potential scalp issues.
Start with a thorough shampoo and condition using a product enriched with oils, like Argan Oil. Many love the Organix line for its wide range of hair care solutions tailored to different needs, while Kim Kimble’s hair care line is also excellent for both relaxed and natural styles.
After washing, choose your drying method, either air-drying or sitting under a hairdryer. But don’t skip the moisturizer! Keeping your hair hydrated is key to avoiding dryness, especially at the ends and edges, during your sew-in.
A small amount of moisturizer goes a long way, so use sparingly for the best results.
For more, check out our collection of hair care products tailored to your needs.
3. Sew-In Stitch Techniques
Using the right stitch technique is crucial for a long-lasting, secure sew-in. Choose one of these stitching methods to firmly attach your wefts to your braids or net, preventing them from slipping:
- Overcast Stitch: This simple technique involves threading the needle through the weft and pulling it through. It’s one of the most popular methods for sew-ins due to its simplicity. Be sure to pull the thread taut to avoid any slack.
- Double Lock Stitch: Similar to the overcast stitch, but with added security. Here, you loop the thread twice each time. This is ideal if you’re looking for extra durability and plan on keeping the sew-in for a few months.
- Lock Stitch: Also similar to the overcast stitch, but with an added loop. After pulling the thread through the weft, insert the needle through the loop before pulling snugly. This technique helps prevent any movement of the tracks.
Each technique provides a durable hold, so select the one that best suits your style goals and desired longevity!
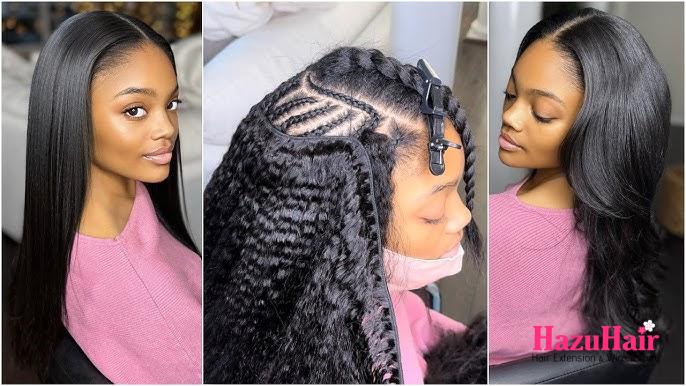
4. Full Sew-In Technique
To make sure your sew-in stands out and lasts, start with a solid braiding foundation—this step will make all the difference in achieving a smooth, seamless look.
How to Sew In a Weave
- Leave-Out for Blending: Leave a small section of hair around the sides and back, so you can blend it for a more natural finish.
- Create Perimeter Braids: Make two perimeter braids, each beginning at the temples and directed towards the back of your head.
- Anchor Braid at the Nape: Form a single braid across the back nape area to act as the anchor for your back wefts. Leave a bit of hair out for blending as needed.
- Divide and Braid: Divide your hair into three sections, spacing each braid about a quarter to half an inch apart before starting. This small spacing reduces tension on your scalp.
- Keep Braids Small and Neat: For a flat, smooth final look, make small, tidy braids going straight back. The smaller braids create a snug foundation that supports the sew-in well, allowing it to last longer.
Sewing Into the Braids
- Start by taking the braids and sewing them down, placing any remaining loose braids between the other cornrows to ensure a flat, smooth base.
- Make sure to knot your thread a few times to secure it well. Take your threaded needle under all three braids, loop the thread twice, and pull it straight through to create a knot. Continue stitching along the braid until it’s fully secured.
- Repeat this process for each braid. Lightly apply oil to your scalp, but be careful not to saturate the scalp or hair.
Remember! A little oil goes a long way. Sew each braid down securely, and place any remaining loose braids between cornrows for the best, flattest base. Make sure to double-knot the thread each time for extra security.
Installing the Closure
When installing a human hair closure extension, align the closure with the part in your hair, leaving about a ¼ inch of the closure in front of the hairline.
Start by making your first stitch through the closure, then stitch into the braid and back through the closure, pulling the thread through.
Loop the thread to the edge of the closure to secure a knot. You’ll need assistance on the other side, so have someone hold the closure down while you secure the opposite side, repeating the same process.
Be careful not to pull too tightly, as you want to protect your edges. Stitch the closure along the perimeter and the braid, ensuring you don’t leave large gaps between stitches to avoid bunching. Always start stitching the sides first, then move to the back, working toward the back of the head.
When you begin sewing your bundles, double the wefts. Start at the back of the head by inserting the needle through the wefts, then through the bottom braid and back through the weft again.
Make 5-7 stitches, then tie a knot. You don’t need to go through the weft with every stitch – aim for every 3-5 stitches. Be sure to go through the wefts when you reach the edge of the head, and remember to knot the thread.
Part the Closure
Begin by anchoring the front of the closure to the braid at the part.
To reduce bulk, use single wefts at the top of the head.
Incorporating a net can help maintain your braided style for a longer period, provide fullness in areas affected by alopecia, protect your natural hair from damage, and assist those with shorter hair.
If you have significant gaps between your braids, short hair, or thin hair, consider using a net to reinforce your foundation.
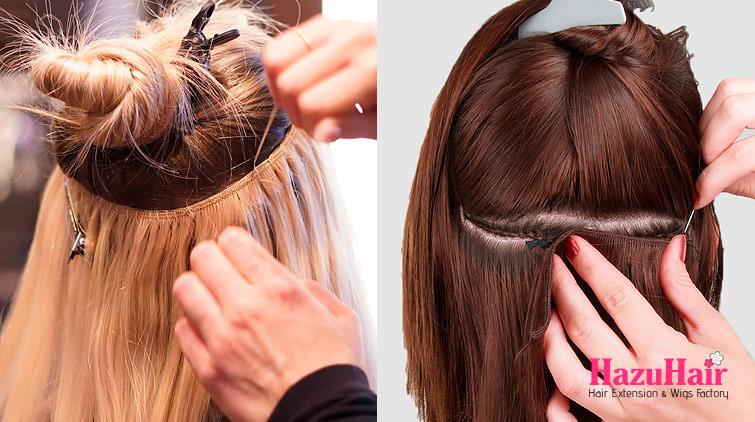
5. Vixen Sew-In Technique
(The recommended limit is no more than three bundles, each no longer than 20 inches.) The Vixen sew-in weave technique offers excellent versatility, allowing you to style your hair into beautiful ponytails and various other looks.
Before you start your installation, refer to the “Prep Your Hair” section above to ensure you protect your natural hair and prevent damage. Leave some hair out along the perimeter to cover the tracks.
To begin, find the center of your head and part your hair down the middle, leaving about 2 cm (½ fingertip) on the outside of each part.
Braiding for a Vixen Sew-In
- Braid the center hair that you’ve left out to keep it separate from your base braids. Then, part your hair from ear to ear, again leaving about 2 cm (½ fingertip) on the outside of each part. Braid this center hair as well, ensuring it’s not incorporated into your base braids.
- Next, braid each section into a beehive braid (small circular braid). Keep the parts small and tight to achieve a flat, flawless finish.
- Complete all four sections in the beehive style, then use a needle and nylon thread to secure the loose ends of each braid. Place the braids between the parts to maintain a flat foundation. Loop the thread and tie a knot twice for extra security. If you choose to use a weaving net, secure it to the perimeters of each braided section.
- At this point, you should have four sections covered with a beehive braid and net.
- Starting from the back with your first section, sew the track under the bottom braid.
- Continue adding tracks on top of one another until you finish the section. Repeat this process for the remaining three sections.
6. Partial Sew-in Technique
A partial sew-in style is ideal if you want the flexibility to style your hair in various ways. Many people find it similar to a quick weave style, allowing for plenty of wear and versatility.
With a partial sew-in, you can achieve a more natural blend between your hair extensions and your natural hair. Updos are a fantastic hairstyle to showcase when you opt for a partial sew-in.
Before you begin your installation, refer to the “Prep Your Hair” section above to ensure you protect your natural hair and prevent damage. Leave some hair out around the entire perimeter of your head.
Braid this hair to keep it separate from your foundation braids. Additionally, braid a section at the crown of your head, as this hair will be left out after completing your partial sew-in. Don’t forget to braid the nape area at the back to anchor your sew-in securely.
Lay the ends of your braids in between the parts and sew each braid in, just as you would for a full sew-in.
Once you’ve finished braiding the rest of your hair in either a beehive pattern or straight back (whichever you prefer), prepare your weaving net.
How to Sew-In Weave
- Keep your net flat and neat, ensuring it covers your entire head.
- Start sewing the net on the side of your deep part. Stitch the top of the net first, followed by the sides, and finish with the back.
- Make sure to sew the net to your braided foundation while avoiding your perimeter and center braids, as these are your leave-out sections essential to the partial sew-in.
- At the back, stretch your weaving net first, then sew it to your braid to prevent any buckling. Trim off any excess netting.
- Now, you can start sewing in your bundles using the fold-over method until you reach the top.
- Finally, unbraid your leave-out and perimeter braids, style it to your liking, and enjoy your new partial sew-in!
7. Invisible Part Sew-In Technique
An invisible part sew-in provides a flawless look without any noticeable tracks that could detract from your style.
Before starting your installation, refer to the “Prep Your Hair” section above to ensure you protect your natural hair and prevent damage.
Begin by braiding your hair in a pattern that accommodates a deep side part, starting each braid on either side in a semi-circular shape. In the back, secure the braids with a rubber band and sew them between a part.
Next, take your wig cap and stretch it over your entire head, making sure it covers your perimeter braids and extends past them.
Get Your Wig Cap Ready
Start sewing your wig cap to the perimeter braid. Feed your needle through the cap, under the perimeter braid, and then back through the cap. Use a double lock stitch to secure the wig cap to the braid. Continue stitching around the perimeter until you return to the front of the hairline.
Now, begin sewing the wig cap around the base area of your invisible braid. Continue until your last stitch meets the perimeter braid. Use the double lock stitch twice to ensure the wig cap is securely attached around the invisible part.
Cut off your thread, then carefully cut the wig cap along the invisible part, leaving a little extra to avoid snipping any of your double lock stitches. Trim the remaining wig cap around your hairline.
Measure the extensions to ensure they are the proper length, allowing them to meet at the beginning of your perimeter braid. Be sure to overextend slightly to achieve the right length, then cut your extensions.
Finally, measure your track at the beginning of the base, take the tracks, and wrap them around the base of your invisible part. Again, make sure to overextend here before cutting your extension.
How to Sew-In Weave
To sew in your first measured track, align it with your perimeter braid. Ensure that your track lays smoothly alongside your braid, with the weft facing toward the back of your head.
Start by inserting the needle through your braid, underneath the extension, and pulling it through the weft. Utilize the double lock stitch method as you sew in the entire track, securing the ends with two double lock stitches.
Once you’ve finished the top of your head, trim any excess weft and repeat this technique for the invisible part section.
For the rest of your head, you can sew in your tracks using the fold-over method, which eliminates the need to cut your wefts. To fill in the area near your part, measure your track from the end of your invisible part braid to just before the weft along the invisible part. Cut the weft and pull your needle through it, using a double lock stitch to secure the thread and trimming any excess.
Without cutting the double thread stitch on the other end of the weft, place the track on the braid. Insert the needle through both the braid and the weft, creating a knot to ensure the weft is secure. Repeat this step once more. For the remaining weft, use a single loop to attach it to the braid. At the end of the weft, perform two double lock stitches to secure it on both ends, then cut the thread. Continue this process until the entire area is covered.
Finishing Up the Invisible Part Sew-In
The final step is to create your closure for the invisible part. Take your hair extension and measure the space left at the top of your head. Using your needle and thread, go through the weft and create a double lock stitch, followed by a second stitch. Roll your extension until it forms a circle, making a single knot after the first roll and continuing to roll and knot until the entire hair track is secured.
As you stitch, ensure you pull your needle through all the wefts. When finished, pull the thread through the weft and underneath all the wefts, securing them with two double lock stitches. Pull the thread tight and cut it.
Next, flip your closure over and spread the hair evenly around it. Use a flat iron to smooth the hair. Now, take your threaded needle and go through a few loops on the closure, pulling the thread through and knotting it with a double lock stitch. At this point, your needle and thread will be attached to your closure.
Use a rubber band to secure the loose hair. Take the side of the closure with the loose string and place it in the exposed area at the crown of your head. Insert the needle through a piece of the track previously sewn along your invisible part. Pull it through and stitch it down. Adjust the thread for a snug fit, but be careful not to pull too tightly. Continue this process around the entire closure. Your final step is to cut the thread to complete your invisible part sew-in.
8. Favorite Sew-In Techniques
In addition to quick weaves, the sew-in process is a more intricate method that requires some time and effort, but it offers a longer-lasting hair experience that maximizes the use of your bundles.
To achieve the best results, follow these step-by-step techniques for yourself or your friends.
Don’t forget to visit our Vietnamese Hair Store to purchase hair bundles that perfectly match your natural hair texture!
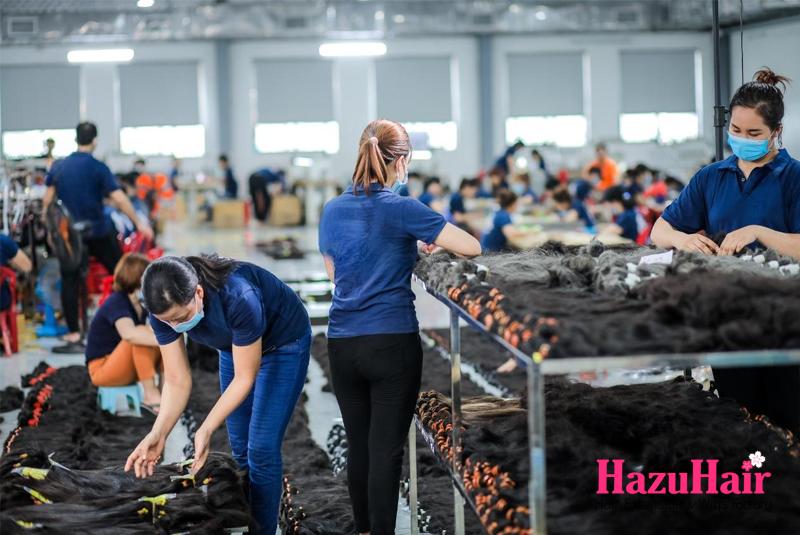
We are a trusted Vietnamese hair factory with over 100 skilled workers, offering a wide range of hair styles including wavy, curly, straight, kinky, and more.
Our products come in various colors such as natural black, ombre, blonde, red, pink, and many others.
Reach out to us today!
- Hair Factory: Tan Son 2 Village, Tan Dinh, Lang Giang, Bac Giang Province, Vietnam
- Hotline: +849 4949 3883
- Whatsapp Mrs ThanhLam: https://wa.me/84949493883
- Website: https://hazuhair.com
