Hair knowledge
Simple Braid Hairstyles Perfect for the Summer
I’m excited to share this article with you, especially as the season changes! I’m hoping to say goodbye to chilly mornings for good. There’s something about flowers blooming and the buzzing of bumblebees that just lifts my spirits.
Can you tell I’m a Southern girl?
I love a sunny day, a tall glass of lemonade, a slice of red velvet cake, a comfy outfit, and, of course, a stunning hairstyle. We all know how much we love switching up our fashion and hairstyles with the seasons.
The styles I’m about to share with you are sure to start some conversations, plus they’ll give your hair a break from all that heat styling. Braided styles are incredibly versatile, and the best part? The techniques I’ll show you are easy to recreate yet look like you’ve spent hours perfecting them.
I hope you enjoy these hairstyle ideas! Feel free to share your thoughts in the comments below, and let me know if you have any other hair questions or suggestions. You know what time it is time to find a reason to dance and sing through the day. So, hit play on your favorite Solange playlist and let’s dive in!
Braiding Essentials
- Elastic bands
- Eco-style gel
- Rattail comb
- Wide-toothed comb
- Hairspray
- Bobby pins
- Brush
- Hair moisturizer
- Jamaican Castor Oil

Braided Rose Hairstyle
The braided rose hairstyle is a beautiful option for both special events and everyday work.
Step-by-step Guide:
- Section Hair: Divide your hair into a section at the crown of your head.
- Create Three Sections: Split the crown section into three smaller parts.
- Braid Each Section: Braid each section downward.
- Secure With Elastic Bands: Use an elastic band to secure the end of each braid.
- Repeat for Remaining Sections: Repeat steps 2-4 for the other two sections of hair.
- Form Flower Petals: Gently pull the front of each braid to shape the petals of the flower.
- Extend the Braids: Pull the braids all the way down to enhance the shape.
- Set With Hairspray: Lightly spray the braids with hairspray to keep them in place.
- Repeat for Other Braids: Repeat the same steps for the remaining braids.
- Create the Rosette: Wrap each braid inward to form a rosette.
- Secure with Bobby Pins: Pin the braid in place to ensure it holds.
- Final Touch: Repeat the steps for the other braids to complete the look.
This style is a creative twist on traditional braids, adding a fun, artistic element to your hair. It’s quick to do and perfect for adding interest to your look.
Try it out and let me know how it goes! Don’t forget to send me your photos I can’t wait to see them!
Tip: Be careful not to braid too tightly to avoid creating unnecessary tension on your scalp.

Floral Bun Hairstyle
The floral bun is a creative and stylish twist on the classic bun, adding a unique, artistic flair to your look.
Step-by-step Guide:
- Create a Ponytail: Gather all your hair into a ponytail and secure it with an elastic band.
- Divide the Ponytail: Split the ponytail into three equal sections.
- Braid Each Section: Braid each of the three sections.
- Loosen the Braids: Gently pull apart the braids to create a fuller, softer look.
- Form the Rosette: Roll the first braid into a rosette shape.
- Pin in Place: Secure the rosette with bobby pins to hold it in position.
- Braid the Second Section: Braid the second section and secure the end with an elastic band.
- Loosen the Second Braid: Pull apart the second braid to add volume and texture.
- Wrap Around the First Bun: Wrap the second braid under the remaining unbraided section and around the first braided rosette.
- Pin the End: Pin the end of the second braid on top of the first rosette bun.
- Braid the Final Section: Braid the last section and secure the end with an elastic band.
- Loosen the Last Braid: Pull apart the final braid to give the style a fuller appearance.
This look can be as messy or as neat as you prefer, depending on the vibe you’re going for. It’s a versatile and eye-catching hairstyle that’s perfect for various occasions.
For a seamless and voluminous look, try using our Burgundy Bulk Human Braiding Hair!

Rope Braided Side Bun
This elegant yet simple rope braided side bun is perfect for any occasion. It’s easy to create, whether on your natural hair or a braided wig, making it a great option when you can’t get to your stylist right away.
Step-by-Step Guide:
- Brush Your Hair: Start by brushing your hair to remove any tangles.
- Moisturize: Apply a moisturizer or oil to your hair for extra hydration.
- Add Gel: Use a small amount of gel at the front to keep the style sleek and smooth.
- Section Your Hair: Separate a section of hair from your hairline to the top of your head.
- Divide the Section: Split this section into two parts, one front and one back.
- Cross the Sections: Cross the front section over the back section.
- Twist the Sections: Twist the combined sections once.
- Take Another Section: Grab another section from the front and combine it with the back section.
- Twist Again: Twist the two sections once.
- Continue Twisting: Keep adding hair and twisting until you reach the end of the braid.
- Smooth Your Hair: As you go, smooth the hair over to the side where you want the braid to fall for a neat look.
- Form the Bun: Once you’ve reached the end, twist the braid into a bun, moving in a clockwise motion.
- Tuck the Ends: Tuck in the ends of the braid to keep them secure.
- Pin the Bun: Use bobby pins to secure the bun in place.
- Set with Hairspray: Apply hairspray to control any flyaways and lock in the style.
- Tame Shorter Strands: Apply more gel if necessary to smooth down any shorter pieces.
- Loosen the Braid: Gently pull on the braid to add volume and loosen the look.
This rope braided side bun is an effortlessly chic style that stays in place all day!

Braided Rose Hairstyle
Here’s a simple and creative way to update your look without relying on heat or heavy products.
Step-by-Step Guide:
- Part Your Hair: Start by parting the front of your hair from ear to ear.
- Secure the Top Section: Gather the top portion of your hair and secure it with an elastic band.
- Create a Part in the Ponytail: Make a part in the ponytail above the elastic band.
- Flip the Ponytail: Take the ponytail over the elastic band and pull it through the part you just created.
- Braid the Hair: Create a three-strand braid with the ponytail and secure it at the end with another elastic band.
- Flatten the Braid: Gently pull apart the braid to flatten it out.
- Roll the Braid: Roll the flattened braid into a bun shape, creating a rosette.
- Pin the Rosette: Use bobby pins to secure the rosette in place.
- Style the Back: Style the back of your hair however you like, whether in loose waves or another preferred style.
This Braided Rose gives you a chic and fresh look with minimal effort!

Fishtail Flower Braid
When I hear the word “fishtail braid,” I used to think it sounded complicated. But trust me, it’s easier than it sounds! This beautiful fishtail braid will be simple to create.
Step-by-Step Guide:
- Part Your Hair: Start by parting the front of your hair from temple to temple.
- Secure the Top Section: Tie the top section of your hair into a ponytail with an elastic band.
- Split the Ponytail: Divide your ponytail into two equal sections.
- Take a Small Section: From the left section, grab a small piece of hair from the edge.
- Cross Over to the Right: Cross the small section over the top and add it to the right section.
- Take Another Small Section: From the right section, grab a small piece of hair from the edge.
- Cross Over to the Left: Cross the small section over the top and add it to the left section.
- Repeat the Process: Continue crossing small sections until you’ve braided the entire ponytail.
- Pin the Braid: Wrap the braid above the elastic band and pin it securely.
- Wrap the End: Roll the end of the braid into the center to complete the flower shape.
- Pull Apart and Fill Out: Gently pull the braid apart to loosen it and create a fuller, more voluminous look.
This fishtail flower braid is a stunning, creative style that’s surprisingly simple to achieve!

Get Cute While Living Your Best Life
HazuHair Extensions is dedicated to keeping you ahead of the style game with the latest trends. We love helping our HazuHair stay beautiful and confident, and we’re here to make sure you always look and feel your best.
The styles we’ve shared are so simple and easy to recreate, but they’ll definitely elevate your look! Whether you’re rocking a protective style or simply looking to try something new, these hairstyles are perfect for any occasion.
Don’t forget to tag us in your photos on Instagram HazuHair. You just might see yourself featured on our feed! We love showcasing our gorgeous community, so keep sharing your stunning looks with us.
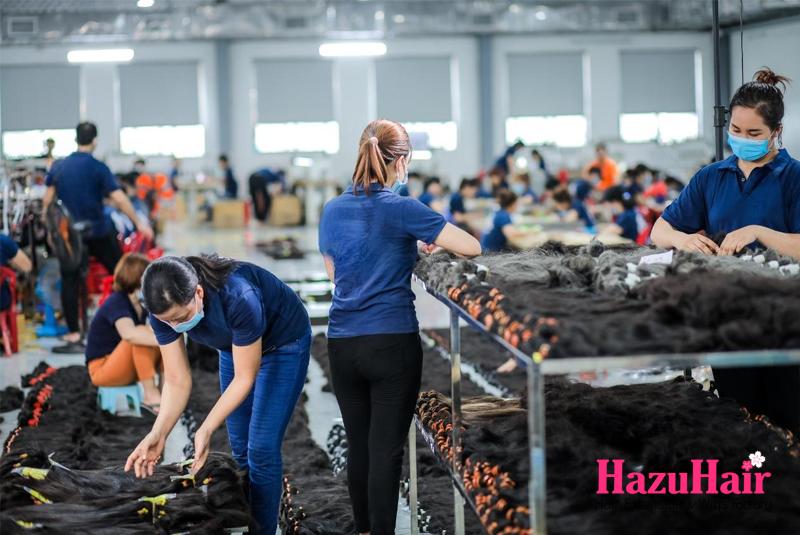
If you’re looking to buy high-quality wigs or hair extensions, look no further than HazuHair.
We are a trusted Vietnamese hair factory with over 100 skilled workers, offering a wide range of hair styles including wavy, curly, straight, kinky, and more.
Our products come in various colors such as natural black, ombre, blonde, red, pink, and many others.
Reach out to us today!
- Hair Factory: Tan Son 2 Village, Tan Dinh, Lang Giang, Bac Giang Province, Vietnam
- Hotline: +849 4949 3883
- Whatsapp Mrs ThanhLam: https://wa.me/84949493883
- Website: https://hazuhair.com