Hair knowledge
How to Make a Wig: Step-by-Step
Human hair wigs have become a lasting staple in the hair industry. Despite the ever-changing hair trends, human hair wigs have stood the test of time, with roots dating back to the ancient days of the Pharaohs. In our modern world, they were once considered a necessity for the older generation or those experiencing hair loss. Initially, they were associated more with special occasions like Halloween costumes rather than everyday wear.
Growing up, seeing many older women wearing wigs, I never imagined that I would start wearing them too, especially in my twenties. I never considered wearing them on a daily basis due to concerns about comfort and stability would it fall off my head? However, my interest in wigs grew, and I decided I really wanted to learn how to make one.

My Experience with Wigs
Over the years, I began wearing wigs for convenience due to a hectic schedule. Initially, I held many misconceptions and myths about wigs thinking they were only for those experiencing hair loss or something reserved for special occasions. However, as I delved deeper into the world of wigs, I realized how versatile and beneficial they could be. Nowadays, even young teens and high school students are embracing wigs, making them a mainstream and practical choice for everyday wear.
Wigs have become the most efficient way to consistently switch up your hairstyle without the need for cutting or coloring your natural hair. They offer incredible flexibility, allowing for a wide range of styles, from sleek and polished to wild and funky. The emergence of innovative solutions, like Headband Wigs, has made wearing wigs even easier and more accessible, especially when you’re in a hurry.
Compared to weaves, wigs require minimal styling and are much quicker to install and uninstall. I can honestly say that wigs may be one of the most convenient hair methods ever known to man. They provide easy access to your scalp, allowing you to condition, treat, and even wash your natural hair underneath. What makes wigs even more appealing is that you can make one from the comfort of your own home, using the right supplies and techniques.
In this blog post, we’re going to go through the process of making a wig and the essential wig-making supplies that you’ll need.
>>>How to Remove a Lace Front Wig
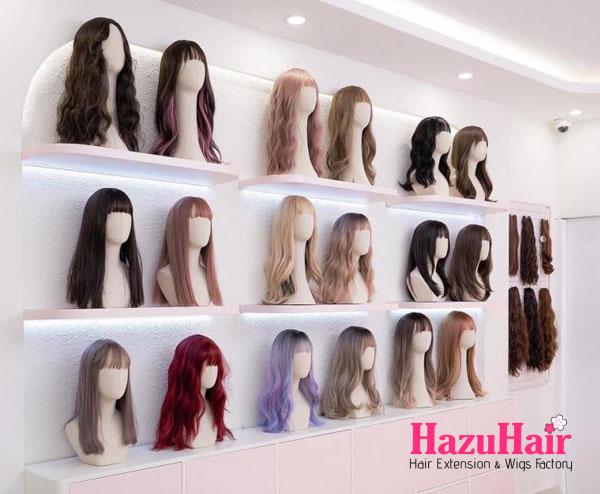
Types of Wigs
To truly understand how to make wigs, it’s important to first grasp the various types of wigs and their differences, as well as their pros and cons. There are five main types of wigs: lace frontal, 360 lace frontal, closure, partial/half, and full regular. Let’s go into detail about each:
Lace Frontal Wigs
The popularity of “Lace Frontal Wigs” has surged significantly over the past year, especially in the wig-making industry. Lace frontal wigs are designed to give the appearance of a natural hairline, allowing your hair to look like it’s growing right out of your scalp.
The great thing about lace frontal wigs is that they offer more styling versatility; you can part your hair in different ways and even style it as if it were your natural hair. These wigs are ideal for those who want a seamless, natural look without the hassle of daily maintenance.
360 Lace Frontal Wigs
A 360 lace frontal wig is similar to a lace front wig but takes the natural appearance a step further. While lace front wigs have lace at the front, a 360 lace frontal wig extends this coverage to the entire perimeter of the wig (360 degrees) and sometimes even the center.
This comprehensive lace coverage allows for versatility in styling, including the ability to wear your hair in a ponytail or updo without exposing the wig’s base. The result is a realistic hairline that looks natural from all angles.
Glueless Wigs
Glueless wigs have become increasingly popular due to their convenience. These wigs are designed to be easy to put on and take off, offering a realistic look without the need for adhesives or glues.
HazuHair has worked to perfect glueless wigs, offering features like bleached knots, glueless bands, pre-cut HD lace, and professional color blending. They provide a secure, comfortable fit and a natural look, making them perfect for those who want a quick and easy solution for changing up their hairstyle.
Closure Based Wigs
Closure wigs are made using lace or silk-based closures. A closure is a small piece of lace or silk that covers the part of the wig, creating a smooth, flat appearance on the scalp. The lace or silk closures range in size from 4×4 lace closures up to 7×7 HD lace closures, providing different levels of coverage and realism.
These closures are used to create a natural look and are often sewn into the wig for added security and comfort. They are ideal for those who want a low-maintenance style without the need for additional styling tools or techniques.

Partial/Half/Front Lace Wigs
Partial or half wigs offer a versatile solution for those who want to integrate some of their natural hair into their wig style. These wigs are designed to leave some of your own hair exposed, allowing you to blend seamlessly with the wig’s extensions. It’s a great option for those who prefer a more natural look and less dramatic change in their hairstyle.
By integrating your own hair, you can create a customized wig that feels more personal and less synthetic. This method is also useful for those who want to leave their edges or front hairline exposed, which provides a natural transition between the wig and their natural hair.
Full Lace Wigs
Full lace wigs are perhaps the most standard and widely recognized type of wig available. They are known for their versatility, comfort, and natural appearance. These wigs are crafted with lace material covering the entire cap, allowing you to part your hair in any direction without revealing the wig’s base.
This type of wig offers the most styling options as you can create different looks, including updos, braids, and ponytails. Full lace wigs come in a vast array of styles, colors, and textures, making it easier to find one that matches your specific preferences.
>>>Top 19 Colored Wigs For Dark Skin Tones
How to Make a Wig Cap
Creating a wig cap is essential for achieving a realistic look when wearing wigs and for providing protection to your hair and scalp. Using a stocking cap method helps ensure that your natural hair lays completely flat, preventing any bumps or lumps that might make the wig appear artificial. Making your own wig cap also allows for better custom fitting to your head size, ensuring comfort and stability while wearing your wig. Below are three simple steps to create a wig cap using stockings.
Step #1
Begin by taking a nylon stocking and pulling it over the crown of your head. Make sure the opening of the stocking lands directly at your hairline edge. This step helps create a smooth base for your wig and prevents any uncomfortable pressure or bulges on the forehead.
Step #2
Next, take the unsecured portion of the stocking and grasp it about one inch away from your scalp. This will prevent the wig cap from being too tight and uncomfortable when you put on your wig. The goal is to create a snug fit that is secure but not overly tight, ensuring that your wig stays in place throughout the day.
Step #3
With your other hand, take the end of the stocking and create a loop by wrapping it around the portion that is one inch away from your scalp. Then, fold this loop through itself and pull both ends tightly in opposite directions to create a knot. Make sure to leave enough excess stocking material to cut off later. Use a pair of scissors to trim the remaining stocking above the knot. This knot helps secure the wig cap and prevents it from slipping off, giving you a natural-looking foundation for your wig.

Do It Yourself Wig
Creating your own wig may seem like a daunting task intimidating, difficult, time-consuming, and tiring. As a result, many people opt to trust professionals for their wig creations or simply purchase pre-made units online. However, with the right tools and mindset, making your own wig is actually quite simple. A do-it-yourself wig offers numerous benefits that may make you reconsider going to a professional or purchasing a pre-made unit.
First and foremost, there is the convenience of saving money. Buying and customizing your wig allows you to invest in high-quality hair bundle deals at a fraction of the cost you would pay for a professionally made wig. This makes it not only more affordable but also allows you to have more control over the final product. By sourcing hair bundles yourself, you can select from a wider variety of textures, colors, and styles, ensuring that your wig matches your preferences perfectly.
Secondly, creating your own wig provides the flexibility of being on your own schedule. You can take your time to experiment with different styles, lengths, and colors until you achieve the perfect look. This process allows for creativity and personalization, enabling you to create a wig that reflects your unique style and personality. Unlike a professional wig that may have a fixed timeline, a DIY wig gives you the freedom to work on it at your own pace, ensuring that every detail meets your standards.
Lastly, making your own wig empowers you with a sense of accomplishment and pride. The satisfaction of wearing a wig that you’ve personally crafted can be incredibly rewarding. It’s not just about having a beautiful wig; it’s about the process of creating it, from selecting the right hair bundles to customizing the wig cap, to styling the final product. This hands-on experience can be a great confidence booster and provide a deeper connection to your personal style and identity.
In conclusion, while creating your own wig may seem intimidating at first, the benefits such as saving money, having full creative control, and achieving a personalized look make it worth the effort. By choosing good hair bundle deals and taking the time to learn the necessary techniques, you can create a wig that not only meets your needs but also exceeds your expectations.
>>>Top 50 Best Wedding Hairstyles for Black Women
How to Make a Wig
You can absolutely do this! Remember, your first attempt at making a wig is likely going to be a learning process everyone goes through it. Even the best stylists had to start somewhere and might not have created a masterpiece on their first try. It’s all about learning and experimenting, finding what works best for you and your unique style. Making a wig is a gradual process, so let’s get started on this exciting journey together.
Starting out, it’s important to be patient and open-minded. The process of wig making involves learning different techniques, working with different materials, and developing your skills over time. Your first wig might not be perfect, but that’s okay it’s a chance to gain experience and confidence in the craft. You’ll learn what methods and materials work best for you, and over time, your technique will improve.
Remember, even professionals didn’t become experts overnight. They had to go through a learning curve to get to where they are now. By embracing this process and staying committed to your wig-making journey, you’ll not only improve your skills but also gain a deeper understanding of the craft.
It’s a creative process that takes time, effort, and practice, so don’t be discouraged if your first attempt isn’t exactly what you envisioned. Each wig you make will be a step closer to mastering the art of wig creation. So let’s dive in, be patient, and enjoy the process because the journey itself is just as rewarding as the final product.
Wig Making Supplies
Now that you understand the types of wigs and the types of hair available, let’s discuss the tools you’ll need to create a full regular wig. Having the proper tools for wig making is crucial to set you up for success, especially since this is the most standard type of wig and the construction methods of this wig type serve as the primary method for most.
You will need the following:
- Wig Head (Mannequin Head): This provides a sturdy base to secure your wig and gives you the ability to see the final look from all angles.
- Hair: Choose high-quality human hair for a more natural look and durability. The hair should be suitable for the style you want to create.
- Wig Stand or Lace Tape: A wig stand helps keep your wig head stable, while lace tape can be used to temporarily secure the lace to the mannequin.
- Needle & Thread, Hair Glue: These are essential for stitching the hair onto the wig cap. You can also use a blow dryer or hot glue gun & sticks to secure the hair in place without stitching.
- Adjustable Dome Wig Cap: This acts as the base for your wig, allowing you to easily adjust the fit.
- Wig Combs: These help secure the wig to your head, preventing it from shifting.
- Wig Band: A wig band adds extra security and comfort, helping to keep the wig in place.
- Scissors: Essential for cutting and styling the wig to your desired length and shape.
- Lace Frontal Glue (Optional): If you’re creating a wig with lace frontal, this glue is used to secure the lace and hairline, giving a more natural look.
You can purchase many of these tools at your local beauty supply store. Depending on the type of wig you choose to make, you may need to buy lace frontal glue to secure the hairline of your wig down. By gathering these essential tools, you’ll be well-prepared to start making your own wig, ensuring a professional-quality finish that’s tailored to your unique style and preferences.

Let’s Create a Wig!
Step 1 – Wig Head
Start by mounting your wig head on a wig stand or setting it down on a chair or table with tape to keep it secure. It’s important to have a stable base for your wig head as you make your wig to ensure easier construction and prevent any wobbling during the process.
Tip: A stable wig head makes the entire process smoother and helps maintain precision in your work.
Step 2 – Prepare Hair Extensions
Next, you’ll need to prepare your hair extensions. Measure and cut them to fit the circumference of the wig cap. Start securing them down from the back to the front. As you work your way towards the front of the cap, lay the tracks in a more U-shape pattern to follow the natural curvature of the head.
Use needle and thread for the most secure attachment, but keep in mind that this method can be time-consuming. Alternatively, you can use hair glue and a blow dryer or a hot glue gun with glue sticks.
Tip: Needle and thread is the most secure method yet takes the longest to install. Hair glue and hot glue are both quicker, but hot glue is a bit more durable. However, it must be handled with caution as the glue is hot and can burn.

>>>Lace Closure vs Lace Frontal: Which is Better for You
Step 3 – Closure or Frontal?
When creating a wig with a lace closure or a lace frontal, the key is to lay that piece down first before adding the remaining extensions. This order ensures a neat and secure application and helps in getting a natural hairline appearance.
For a deep part, it’s best to use a 13×6 HD frontal. This size will give you enough space to see how much hair you need and precisely choose where you want the closure or frontal to lay on your head. This step also allows you to visualize how the hair will sit and move, making it easier to plan the direction of the tracks and avoid unwanted gaps.
Step 4 – Track
After positioning your closure or frontal, begin adding the track extensions. Pay close attention to the direction you want your frontal part to lay. This will affect the overall style and movement of your wig. Make sure each track is secured tightly and neatly to avoid any lumps or unevenness in the wig cap.
Step 5 – Wig Band
Incorporate a wig band and wig combs into the inside of your wig. This addition enhances the security of the wig when wearing it, preventing it from slipping off, especially during active use. The wig band adds extra support and helps keep the wig in place, making it feel more like a part of your natural hair.
Tip: If you are making a frontal wig, remember to remove any lace that isn’t necessary for securing the wig. This will give you a more seamless, natural look and allow for easier styling and adjustment.
Step 6 – Style
Once your full wig is completed, it’s time to style it! You have the freedom to cut the front of your wig into blunt bangs, a side part, or a middle part, depending on your preference and the style you desire. If you’re working with curly hair, you can style it as a fro for a bold, voluminous look.
Tip: If you want to color your hair, it’s advisable to do that before constructing your wig. Coloring afterward can sometimes affect the wig’s structure and texture, so pre-coloring allows for a more even and precise application.
Creating your own wig allows for greater customization and control over the final look, ensuring it matches your personal style and preferences perfectly. With the right techniques and supplies, making a wig can be an empowering and fulfilling DIY project.

Accessories for Wigs
Wig accessories play a crucial role in maintaining and prolonging the life of your new wig. Proper care for your wig is essential, much like caring for your natural hair, to keep it looking its best and ensure it lasts as long as possible. Below are a few must-have accessories to include in your wig regimen, making the maintenance process effortless and straightforward.
- Wig Stands
Wig stands are essential for the care and storage of your wig. Not only do they help maintain the shape of your wig, but they also make the styling process much easier. Wig stands allow your wig to dry properly after shampooing, ensuring it doesn’t lose its shape and fit.
They help keep the wig off any surface, preventing it from getting tangled or misshaped. Additionally, wig heads are great for holding the wig in place while you style it, ensuring that the wig conforms to your head properly when worn. This is especially important when dealing with lace wigs, as it prevents stretching and ensures a secure fit.
- Wig Combs and Clips
These accessories are designed to secure your wig in place, preventing it from slipping off, especially during activities like sports or dancing. Wig combs and clips are usually attached to the inside of the wig, providing extra stability and holding power. They are particularly useful for lace wigs, where the lace material might stretch over time, causing the wig to lose its grip.
- Wig Band
Adding a wig band to the inside of your wig can help with the overall security and comfort. A wig band sits at the nape of your neck and helps hold the wig in place. It’s especially beneficial for lace wigs, as it can reduce the pressure on the lace and prevent the wig from shifting during wear. The band also helps in achieving a more snug fit, giving the wig a more natural and secure look.
- Wig Care Products
Investing in wig-specific care products such as shampoos, conditioners, and sprays can significantly extend the lifespan of your wig. These products are specially formulated to keep the fibers hydrated, prevent tangling, and maintain the wig’s softness and shine. Regular use of wig care products ensures that your wig remains in excellent condition and looks as good as new.
- Wig Cap
A wig cap is another essential accessory for keeping your wig secure and comfortable. It creates a barrier between your natural hair and the wig, helping to hold everything in place and prevent friction. Additionally, it keeps your natural hair flat against your head, making the wig fit more securely and comfortably.
Wig accessories make the process of wearing and maintaining a wig much easier, allowing you to enjoy the versatility and style of your wig without any hassle. By using these accessories, you not only extend the life of your wig but also enhance the overall wearing experience, ensuring that your wig always looks its best. Now, even though wigs may seem intimidating at first, as we have shown, they are not as difficult to make or maintain as you might think.

>>>Weaves vs Wigs: What is The Difference and How to Choose
It Just Takes Practice!
Creating your first wig can be a challenging but rewarding experience. It’s understandable if it doesn’t turn out perfectly the first time many people find that their initial attempts are not exactly as they envisioned. That’s completely okay! The most important thing is to learn from the process and continue to practice. With each attempt, you’ll gain more confidence and improve your skills in wig making.
To help you along the way, it’s crucial to have the best wig making supplies at your disposal. Whether you need wigs heads, hair extensions, glue, or other tools, HazuHair’s hair stores are a great resource where you can find everything you need. Make sure to stock up on the essentials, and don’t hesitate to ask questions or seek advice from the staff they are there to support you on your wig-making journey.
If you have any wig making questions or concerns, feel free to leave a comment below. We would be more than happy to assist you and share tips to make your wig making experience smoother and more enjoyable. Remember, practice makes perfect, so keep trying and refining your technique your perfect wig is just around the corner!
and…
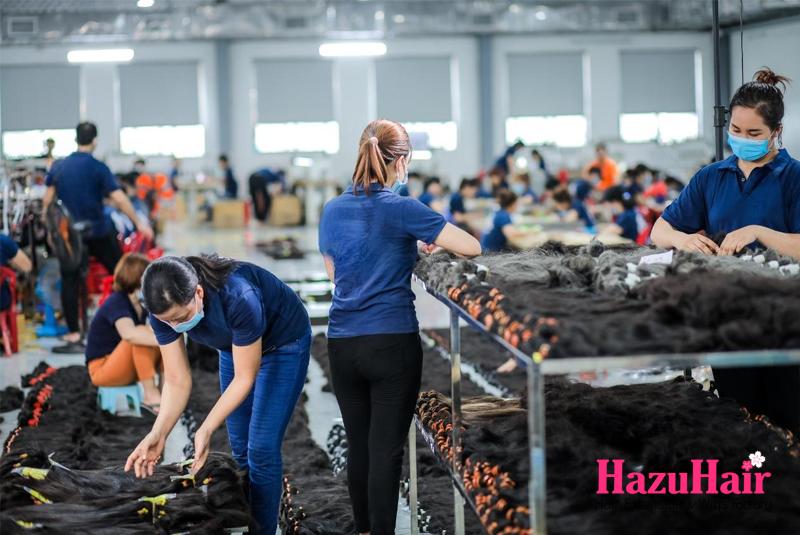
If you’re looking to buy high-quality wigs or hair extensions, look no further than HazuHair.
We are a trusted Vietnamese hair factory with over 100 skilled workers, offering a wide range of hair styles including wavy, curly, straight, kinky, and more.
Our products come in various colors such as natural black, ombre, blonde, red, pink, and many others.
Reach out to us today!
- Hair Factory: Tan Son 2 Village, Tan Dinh, Lang Giang, Bac Giang Province, Vietnam
- Hotline: +849 4949 3883
- Whatsapp Mrs ThanhLam: https://wa.me/84949493883
- Website: https://hazuhair.com