Hair knowledge
How to Install a Glueless Wig: Step-by-Step Tutorial
In today’s era of evolving hair fashion, wigs have become the ultimate go-to for accessible and versatile hairstyles. Among them, human hair wigs glueless have seen a significant rise in popularity, celebrated for their convenience and user-friendly design.
Unlike traditional wigs that rely on adhesives, glueless wigs eliminate the need for potentially harmful glues and tapes. Instead, they come equipped with adjustable straps, combs, and elastic bands, offering a secure fit while minimizing damage to natural hair. This innovative design not only ensures the health of your scalp but also prioritizes the protection of your natural hair.
Glueless wigs are incredibly easy to wear and remove, making them an ideal choice for individuals seeking hassle-free hairstyling solutions. These wigs also enhance the wearer’s appearance with features like pre-plucked hairlines and lace fronts, creating a seamless, natural look that mimics real hairlines.
Beyond their practicality, glueless wigs prioritize comfort without compromising on versatility. Whether you’re aiming for a sleek, professional style or a playful, voluminous look, these wigs adapt effortlessly to various preferences. To fully enjoy the benefits of a glueless wig, proper installation is essential. Keep reading to explore a step-by-step guide to mastering the glueless installation process.
Materials Required for Installing a Glueless Wig
Before you begin the installation process of a glueless wig, it’s important to gather all the necessary materials to ensure a smooth and successful application. Here are the essential items you’ll need:
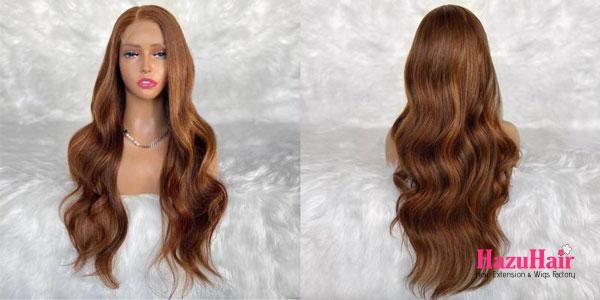
- A High-Quality Glueless Wig: For the best results, consider using a Penelope Glueless HD Closure Wig from HazuHair. These wigs come equipped with HD lace closures that provide a natural look and seamless blending, enhancing the overall appearance of the wig.
- Wig Cap: This acts as a protective layer between your natural hair and the wig, helping to create a smooth base for installation.
- Wide-Tooth Comb: Used to detangle your natural hair and gently style the wig before and after application.
- Hair Clips: These are crucial for sectioning your hair and keeping it out of the way during the installation process.
- Hair Brush: A soft-bristle brush can be used to smooth the wig’s hair and blend it with your own.
- Edge Control Gel: This helps keep your natural edges in place, providing a neat and polished look.
- Rat-Tail Comb: Useful for precision when parting your hair and ensuring even application of gel or glue.
- Hair Pins: These come in handy to secure any loose sections and ensure the wig stays in place throughout the day.
- Scissors: For trimming excess lace and adjusting the wig to fit your head perfectly.
- Mirror: A full-length or handheld mirror is essential for checking the wig from different angles and ensuring it is properly positioned and blended.
>>>How To Take Care Of Hair Extensions
Step-by-Step Guide for Glueless Wig Installation
Step 1: Prepare Your Natural Hair
The installation process begins with preparing your natural hair to create a smooth and secure base for the wig. Start by washing your hair with a mild shampoo to remove any dirt, excess oil, and product buildup. Follow up with a conditioning treatment to add moisture and softness to your hair, allowing it to dry for a few minutes.
If needed, use a blow dryer with a low heat setting to expedite the drying process. To detangle your hair without causing damage, use a wide-tooth comb while it is still damp. For added smoothness and protection, apply a leave-in conditioner to your hair.
If your natural hair is long, consider braiding it or putting it into cornrows to minimize bulk under the wig, which also helps with the comfort of wearing the wig. A small amount of scalp oil can be used to prevent dryness and irritation. Once your natural hair is ready, you can move on to the next step.
Step 2: Wear a Wig Cap
To achieve a seamless application, wearing a wig cap is essential. This step helps to keep your natural hair in place and provides a smooth base for the wig. Start by pulling a wig cap over your hair to ensure full coverage of your natural hairline and secure it comfortably around your head.
The wig cap not only creates a barrier between your natural hair and the wig, preventing any rubbing or irritation but also ensures that the wig fits snugly without feeling too tight. It is important to find a wig cap that is the right size and not overly tight to avoid discomfort. You can find wig caps easily at stores like HazuHair. With your natural hair securely tucked away under the wig cap, you are now ready to proceed to the next step in the glueless wig installation process.

Step 3: Secure the Wig Cap
To ensure that your wig cap stays in place and minimizes the risk of slipping, securing it properly is essential. Begin by using hairpins to anchor the wig cap to your head. Place the pins around the perimeter of the cap, particularly focusing on the neck nape and behind the ears. This strategic placement helps to keep the wig cap from shifting and removes any unwanted wrinkles.
It is advisable to use lightweight hairpins that blend well with your natural hair color for a seamless appearance. Once the wig cap is secured, gently turn your head from side to side to check if it remains in place and there are no wrinkles in the cap. If everything feels secure, you can move on to the next step.
>>>Quick Weave: A Guide on Everything You Need to Know!
Step 4: Prepare the Wig
Now it’s time to prepare your glueless wig for installation. For ease of use and a more natural look, consider using HazuHair’s glueless wigs, which come with features like bleached knots and ventilated hairlines. Start by gently detangling the wig with a wide-tooth comb, starting from the tips and working your way up to avoid any damage to the hair.
If necessary, trim any excess lace from the front of the wig, being careful not to cut too close to the hairline. Trim the extra lace carefully to maintain the wig’s natural appearance. Make sure the adjustable straps on the inside of the wig are loosened to their maximum length before placing it on your head for a test fit.
Once the wig is properly fitted and you are satisfied with the appearance, you can secure it with the built-in clips, combs, and straps that come with most glueless wigs. These features are designed to help keep the wig in place without the need for glue, allowing for quick and easy removal when necessary.
Step 5: Adjust the Wig’s Fit
The key advantage of glueless wigs is their adjustable features, which provide a secure and comfortable fit. Most glueless wigs come with adjustable straps at the nape of the neck and sometimes on the sides, as well as combs sewn into the wig cap. Begin by placing the wig on your head and aligning the front edge with your natural hairline.
Next, tighten the adjustable straps one by one to customize the fit to your head size. Insert the built-in combs into your natural hair to secure the wig firmly in place. Check for comfort by gently tugging the wig to ensure it does not feel too tight and that it remains securely in place throughout the day. This final adjustment ensures that the wig stays comfortable and in place, giving you a natural and confident appearance.

Step 6: Blend the Wig with Your Hairline
To achieve a seamless blend between your natural hairline and the wig, it’s important to use edge control gel. This will enhance the realism and make the wig look as natural as possible. Take a small amount of edge control gel and apply it to a rat-tail comb.
Gently smooth the gel along the entire perimeter of your hairline, paying close attention to areas where the lace or cap of the wig is most noticeable. The gel will help to lay down the hairs and create a smooth transition from your natural hair to the wig, effectively eliminating any visible gaps. This step is crucial for achieving a natural and flawless look, especially if you have a visible lace front or a wig with a distinct cap line.
>>>Sew In VS Quick Weave: What’s The Difference
Step 7: Style the Wig
Once the wig is securely in place and blended with your natural hairline, you can start styling it to match your desired look. Glueless wigs offer a wide range of styling possibilities without the hassle of glue or adhesive. Gently detangle the wig hair with a wide-tooth comb, working from the tips to the roots to avoid damage.
If you prefer a sleek and straight style, use a flat iron set at a low heat to straighten the hair. Take your time, working in small sections to ensure even heat distribution. For those who prefer a voluminous look, consider styles like waves or curls, which can be achieved using a curling iron or hot rollers. If you’re using heat tools, always apply a heat-protectant spray to minimize damage and maintain the wig’s quality.

Step 8: Secure the Wig for Extra Hold
To provide additional security for your glueless wig, if you feel it may be loosening, you can use hairpins for extra hold. Hairpins can help ensure that the wig stays in place, especially during activities like exercise or when moving around.
Place the hairpins strategically along the perimeter of the wig, focusing on areas that are particularly prone to loosening, such as around the temples, the nape of the neck, and behind the ears. Distribute the pins evenly to avoid discomfort and to maintain an even hold throughout the wig. This extra step can be especially helpful if you’re wearing the wig for an extended period or for events that require more security.
Step 9: Final Touches
The final touches are crucial for ensuring that your glueless wig looks polished, feels secure, and stays in place throughout the day. Start by doing a mirror check to assess your overall look. Check for any visible lace, gaps, or areas that need blending to achieve a natural appearance.
If you notice any, use a small amount of edge control gel on a rat-tail comb to gently smooth down the hairs around your hairline. Blend the gel along the entire perimeter, paying extra attention to where the lace or cap of the wig is most noticeable.
Adjust the wig’s fit as needed by tightening the adjustable straps at the nape of the neck and, if necessary, around the temples. This will help the wig sit securely without shifting. Check for comfort in movement by gently tugging the wig and making sure it’s snug but not tight. It’s important that the wig feels comfortable for long-term wear.
>>>Should You Get Braids This Summer? Pros and Cons to Consider
Seamless Glueless Wig Installation
In the realm of contemporary hair fashion, glueless wigs have become a prominent choice due to their numerous advantages and user-friendly features. Unlike traditional wigs that rely on adhesive chemicals, glueless wigs prioritize the safety and well-being of natural hair. They incorporate harmless elements such as adjustable straps and combs that provide a secure fit without risking damage to the scalp or hair.
This makes them ideal for those who want to enjoy the versatility and style of a wig without the stress of adhesive residues or potential hair loss. The installation process of glueless wigs is straightforward, allowing users to achieve a realistic and natural look effortlessly. With a seamless blend to the natural hairline, these wigs mimic the appearance of hair growth directly from the scalp, enhancing realism and authenticity.
The simplicity of their application makes them accessible to a wide range of users, from beginners to professionals, ensuring anyone can achieve a flawless hairstyle without complicated techniques. Glueless wigs not only offer convenience and practicality but also adapt easily to different styles and occasions.
Whether for daily wear, special events, or even quick transformations, they provide an easy and stylish hair solution that fits seamlessly into today’s dynamic fashion landscape. For those looking to explore the world of wigs without the hassle of glue or adhesives, glueless wigs are the perfect option. Check out this glueless wig guide to become an expert in achieving the perfect look and enjoy the freedom to change your style whenever you want.
and…

If you’re looking to buy high-quality wigs or hair extensions, look no further than HazuHair.
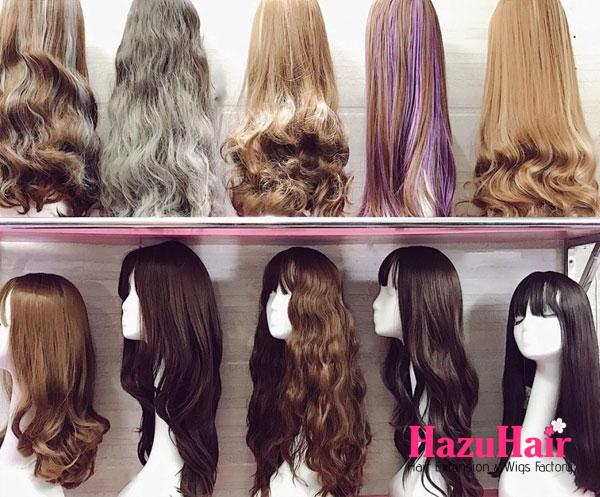
We are a trusted Vietnamese hair factory with over 100 skilled workers, offering a wide range of hair styles including wavy, curly, straight, kinky, and more.
Our products come in various colors such as natural black, ombre, blonde, red, pink, and many others.
Reach out to us today!
- Hair Factory: Tan Son 2 Village, Tan Dinh, Lang Giang, Bac Giang Province, Vietnam
- Hotline: +849 4949 3883
- Whatsapp Mrs ThanhLam: https://wa.me/84949493883
- Website: https://hazuhair.com