Hair knowledge
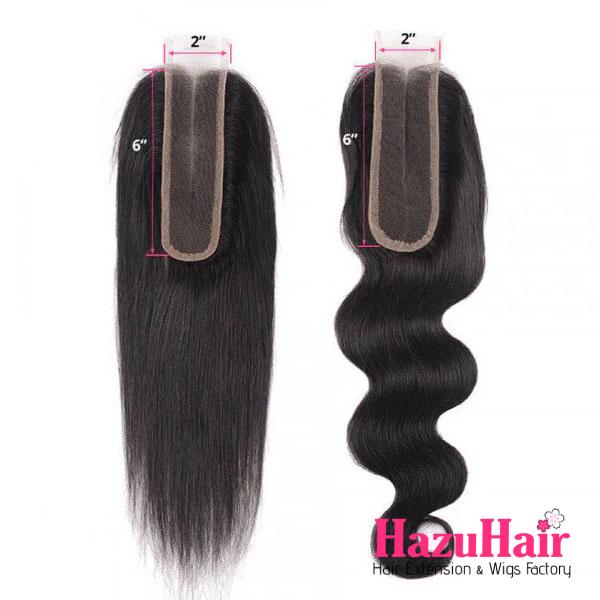
DIY 2×6 Lace Closure Install: Tips for Home
Heading to the salon every time you need to install your lace closure can take a serious toll on your wallet. Why not take matters into your own hands and become a DIY queen? With a little practice, you might even turn your skills into a side hustle!
Ready to dive in? Grab your 2×6 closure, your styling tools, and a can-do attitude let’s get started!
First things first: wash your hair thoroughly. Clean hair and a healthy scalp are the foundation of a successful install. Since your lace closure and wefts typically last 4-6 weeks, starting with a fresh canvas helps prevent itching and discomfort that could cut your style short. Keeping your scalp squeaky clean will ensure your look stays flawless and comfortable for the long haul.
With the right prep and technique, you’ll have the confidence to master your own installs and maybe even help others do the same!

Step 1: Gather Your Tools
Before we dive into the magic of transforming your look, it’s essential to gather everything you’ll need for a smooth, frustration-free installation process. Here’s your checklist:
- Wig Stand: Your trusty assistant for keeping things stable.
- Needle and Thread: A curved needle is popular for weaving ease, but if you’ve ever sewn your fingers by accident (we’ve all been there), consider a straight needle for better control.
- Wig Cap: This helps secure your style and adds that much-needed snug fit.
- Scissors: For precision when trimming lace and shaping your masterpiece.
- Hair Clips and Pins: Chaos is inevitable, but clips will keep stray hairs in check.
- Tail Comb: Perfect for creating sharp, clean parts like a true professional.
- Lace Frontal Glue or Bonding Adhesive: Your secret weapon for keeping things secure.
- Curlers and Flat Iron/Stretcher: For styling your locks into perfection.
- Blow Dryer: Essential for setting glue and achieving a flawless finish.
- Mirror (or two): More mirrors mean better angles for precision.
>>>Bulk Human Braiding Hair Care Routine and Maintenance Tips
Step 2: Prep Your Hair with Cornrows
Now it’s time to lay the foundation. Start by parting your hair typically at the center if you’re working with a 2×6 lace closure. Precision is key, so make sure each braid emerges neatly from the part.
When braiding cornrows, keep them small and tidy to ensure they’ll hold your wefts securely. As you work, connect the end of each braid to the next one, creating a smooth, continuous pattern that lies flat against your scalp. Think of it as a secure network designed to keep everything sleek and in place.
Once your cornrows are complete, nourish your scalp with a light coating of argan oil or coconut oil. This keeps your hair moisturized, reduces friction, and helps prevent that annoying itchiness that can tempt you to remove your style prematurely.

Step 3: Apply Your Mesh Weave Cap for a Natural Look
This step is all about making your lace closure blend seamlessly with your scalp for that flawless, natural finish. Start by placing the mesh weave cap snugly over your cornrows. The cap serves as a base, keeping everything secure while creating the illusion of a scalp beneath your lace closure.
Now, grab a pencil or fabric marker to outline where your 2×6 lace closure will be positioned. This is a critical step to ensure precise placement. Place the closure on your head and carefully trace its edges to create a clear guide.
- Sewing the 2×6 Lace Closure
Once your outline is marked, begin sewing the closure along the sides of the outline. Use a curved or straight needle and thread, making small, tight stitches to keep it firmly in place. For added security, sew as close to the edge of the lace as possible without tearing it.
When you reach the front hairline, switch to lace glue or bonding adhesive instead of sewing. Apply a thin, even layer of glue along the front edge to secure the closure while maintaining a smooth, scalp-like appearance. Use a blow dryer on low heat to set the glue for extra hold.
- Trimming and Blending
After the closure is secured, carefully trim away the excess mesh cap along the outline that you didn’t sew down. This removes any extra material that might show or bunch under your closure. Be precise to avoid cutting into the stitches or the lace itself.
- Alternative Method: Foundation Application
If you prefer to skip the glue, another popular technique is applying liquid foundation or powder that matches your skin tone directly onto the lace. This creates the illusion of scalp color without needing extra adhesive. Simply sew the sides and back of the closure to your cornrows and blend the front edge using makeup.
>>>Hair 101: Bulk Human Braiding Hair Ultimate Guide
Step 4: Place a Weaving Hair Net on Top of Your Head
Now that your lace closure is securely in place, it’s time to add a crucial layer: the weaving hair net. Typically, weaving hair nets come in black, making them a great option for most people. However, you can easily find one that matches your hair color if needed. The purpose of this hairnet is to provide an even base, ensuring that your wefts and closure stay secure while also helping the final look to blend seamlessly with your natural hair.
This step might feel a bit intimidating, especially if you’re new to it, but don’t worry it’s manageable with the right approach. A simple hack to make it easier is to use a square-shaped hairnet that is large enough to cover your entire head from hairline to hairline. Once you have the right size, place the net on top of your head and secure it using hair clips.
To sew the net in place, work with small, close stitches around your head. Make sure to sew it tightly, especially around the edges, to prevent it from shifting. After securing the net, trim any excess material as closely as possible to your cornrow edges and the stitching, ensuring a neat, professional look.
This step is optional, depending on your hair’s thickness. If you’re looking to create extra fullness or if your hair is thinning, the net helps give you more structure and stability, allowing you to sew in additional wefts. However, if your hair is already full, you can skip the netting and sew the wefts directly into your cornrows for a more streamlined process.
Step 5: Sew the Weft In
With the base firmly in place, it’s time for the next step: sewing in your wefts. Start at the bottom of your head and work your way up. Using small, tight stitches, sew the first row of hair wefts into your cornrows, ensuring they stay securely in place. As you sew, remember to double the weft to create fullness and volume in the lower sections.
As you approach the closure, switch to using single wefts to ensure the top layers are sleek, flat, and natural-looking. This technique allows you to achieve a smooth, seamless finish that won’t be bulky at the top, ensuring that your 2×6 closure blends flawlessly with the rest of your hair.

>>>Top 5 Hairstyles You Can Achieve with Bulk Human Hair Extensions
STEP 6: Styling Your 2×6 Lace Closure
Now comes the fun and creative part styling! After ensuring your closure and wefts are securely in place, it’s time to transform your look. Whether you prefer voluminous curls or a sleek, straight finish, the choice is yours.
Start by using a rattail comb to part the closure where you want. The beauty of a 2×6 lace closure is its flexibility, allowing you to experiment with different parting styles. Make sure to blend the closure with your natural hair for a seamless, polished appearance.
If you want curls, grab your curling wand or rollers. For a smooth, straight look, a flat iron will do the trick. Set everything with a lightweight styling product to keep your hair looking fresh.
Congratulations! You’ve successfully installed and styled your own 2×6 lace closure. Rock your new look with confidence you did it yourself!
and…
If you’re looking to buy high-quality wigs or hair extensions, look no further than HazuHair.
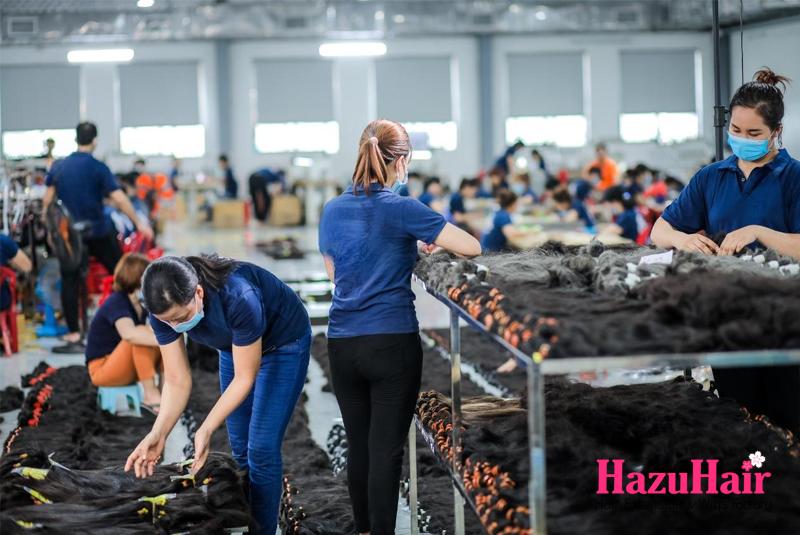
We are a trusted Vietnamese hair factory with over 100 skilled workers, offering a wide range of hair styles including wavy, curly, straight, kinky, and more.
Our products come in various colors such as natural black, ombre, blonde, red, pink, and many others.
Reach out to us today!
- Hair Factory: Tan Son 2 Village, Tan Dinh, Lang Giang, Bac Giang Province, Vietnam
- Hotline: +849 4949 3883
- Whatsapp Mrs ThanhLam: https://wa.me/84949493883
- Website: https://hazuhair.com