Hair Care Tips
How to bleach the knots on your closure or frontal: 5 easy steps
Bleaching the knots on your closures and frontals can be quite simple, but it’s highly recommended to have this process done by a professional to avoid over-bleaching or damaging the delicate lace.
However, if you choose to do it yourself, remember that the lace material on most closures and frontals is very thin and fragile, making it prone to damage from the products used in this process. With that in mind, let’s walk through the steps to help you achieve the best results.
What Are Wig Knots?
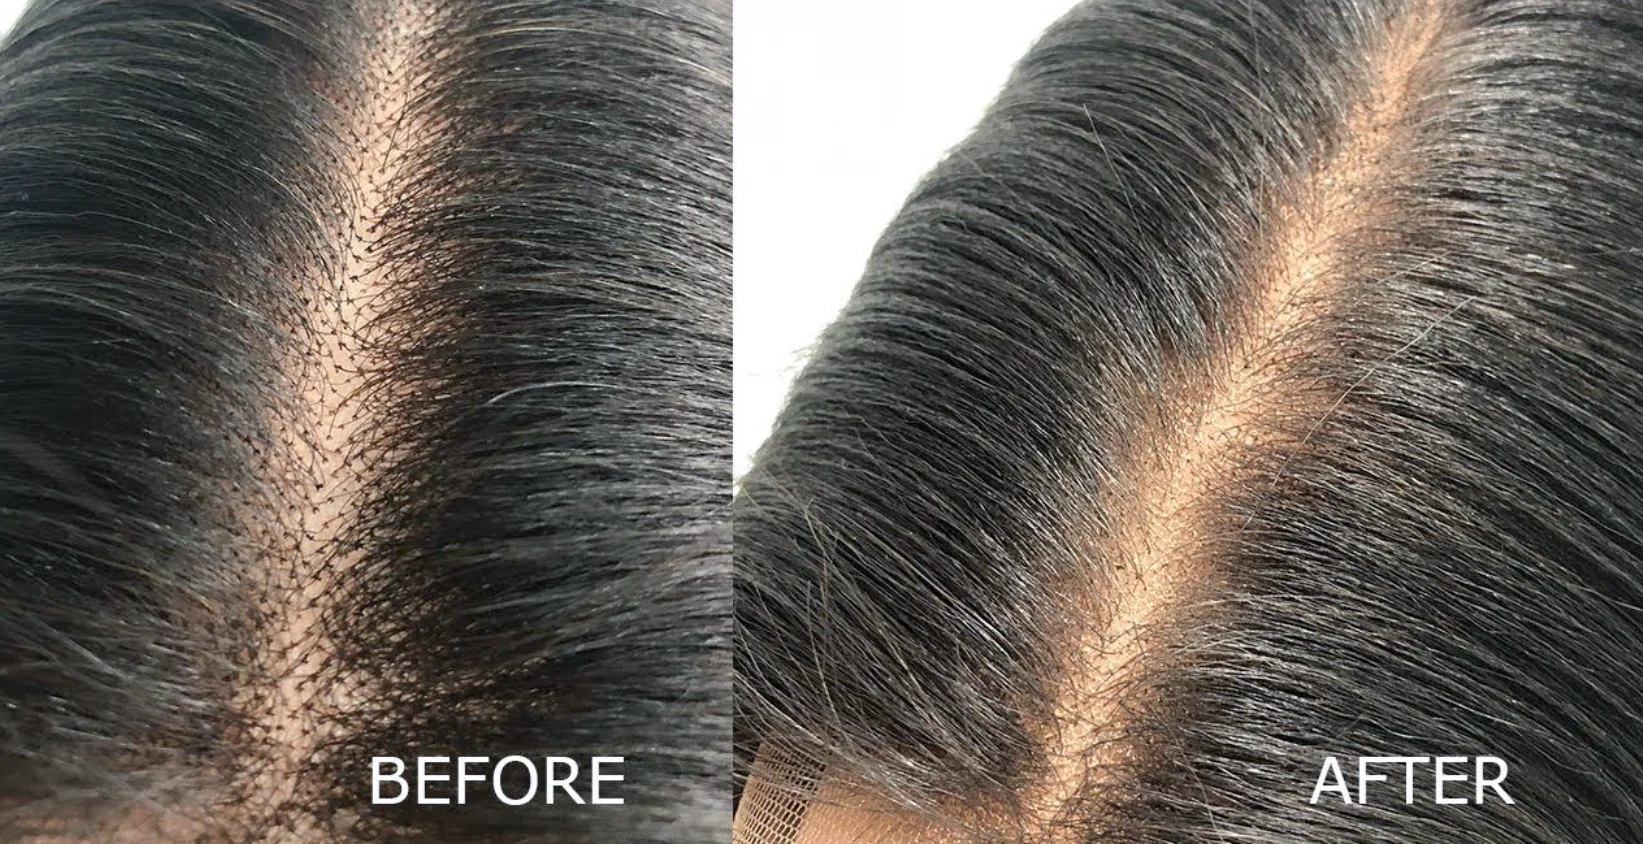
Wig knots refer to the tiny knots formed where each strand of hair is tied onto a wig’s lace cap. These knots play a crucial role in securing the hair to the lace, preventing hair loss and excessive shedding. There are two main types of wig knots: single knots and double knots. Let’s take a closer look at each.
- Single Knots: Single knots involve one strand of hair, making them the smallest and most discreet knots. The advantage of single knots is that they are barely visible, giving your wig’s hairline and part a very natural appearance. They are also quicker and easier to bleach. However, single knots are less durable and prone to shedding more easily.
- Double Knots: Double knots, on the other hand, are made with two or more hair strands, making them larger and more noticeable than single knots. They are more difficult to bleach but offer greater durability, resulting in less shedding.
- Single Knots vs. Double Knots: Wigs often combine both types, with single knots around the hairline for a natural look and double knots on the rest of the lace to reduce shedding and increase durability.
Bleached Knots vs. Unbleached Knots
When deciding whether to bleach wig knots or leave them unbleached, it’s essential to understand the differences between the two.
Bleached Knots: Bleached knots make the wig look more natural by lightening the knots to a shade closer to your skin tone, giving the illusion that the hair is growing directly from your scalp. However, bleaching can weaken the knots, leading to increased shedding over time.
Unbleached Knots: Unbleached knots are stronger and more resistant to shedding, but they tend to appear as black dots on the lace, which can make the wig look less natural.
What Is Bleaching Knots?
Bleaching knots is a method used by wig wearers and manufacturers to make the knots less visible. The bleach lightens the knots so that they blend better with the lace and the scalp. Though the process might seem complex at first, it becomes more manageable with practice.
Why Bleach Wig Knots?
Bleaching wig knots is essential for achieving a realistic appearance. On darker wigs, the knots are highly visible when left unbleached, revealing that the hair is not growing from your scalp. While some people attempt to conceal the knots with makeup or sprays, bleaching remains the most effective method for making them virtually undetectable.
How to Bleach Wig Knots: Step-by-Step Guide
Now that you’ve gathered all the necessary products and tools, it’s time to dive into the bleaching process! Follow these step-by-step instructions to bleach your wig knots quickly and effectively.
Step 1: Prepare Your Wig
Without a Mannequin Head:
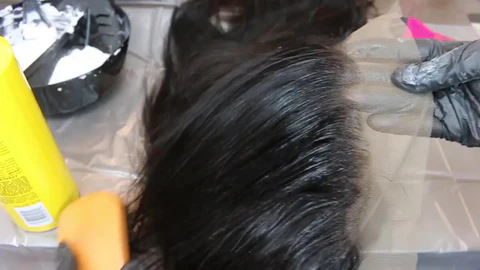
- Lay your wig on a table or counter with the lace facing down.
- Lightly spray the wig with water to dampen it.
- Brush the baby hairs and flyaways toward the back to avoid getting bleach on them.
- Use alligator clips to secure the hair out of the way.
- Turn the wig upside down and place it on top of the foil.
With a Mannequin Head:
- Place the wig on your mannequin head.
- Lightly spray the wig with water to dampen it.
- Brush the baby hairs away from the lace and secure them with alligator clips.
- Remove the wig from the mannequin and turn it inside out.
- Place the wig back on the mannequin and use T-pins to hold it securely in place.
Now your wig is ready for bleaching!
Step 2: Prepare the Bleach Mixture
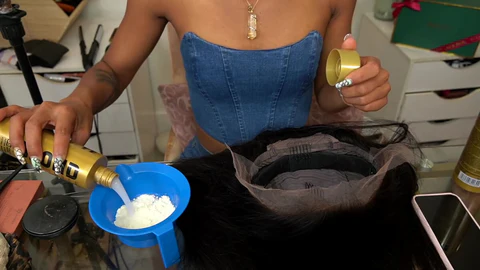
- Put on gloves to protect your skin from the chemicals.
- Measure the bleaching powder:
- 1 scoop for a lace closure wig.
- 2 scoops for a lace frontal wig.
- 4–8 scoops for a full lace or 360 frontal wig.
- Add developer to the bleach powder. For each scoop of bleach powder, add 2 tablespoons (1 ounce) of developer. The standard ratio is 1:1 (1 ounce bleach powder to 1 ounce developer).
- Mix thoroughly with a tinting brush or plastic spoon until smooth and clump-free.
- Check the consistency: The mixture should be thick like cake frosting, so it doesn’t seep through the lace. If it’s too runny, add more bleach powder; if it’s too dry, add more developer.
Choosing the Right Developer Strength
Developers come in volumes of 10, 20, 30, and 40. The higher the number, the lighter your knots will become and the faster the bleach will process.
- For most wigs, a 20 or 30 volume developer works well.
- For lighter skin tones, you may need a 40 volume developer for optimal results.
Remember, stronger developers can cause more damage, so choose accordingly to balance effectiveness with care for your wig knots.
Step 3: Apply the Bleach Mixture
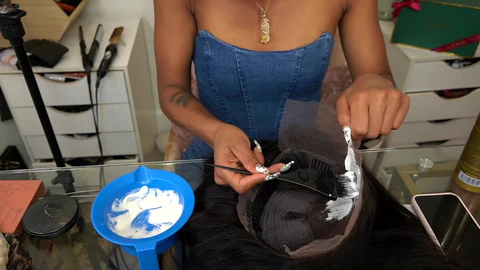
When applying the bleach mixture, resist the urge to press it into the lace, as this can damage the roots of the hair. Follow these steps to ensure the best results:
- Gently dab the mixture onto the lace using a tinting brush. Avoid pushing it through the lace to prevent the bleach from reaching the hair roots.
- If you’re not comfortable with a tinting brush, you can use a plastic spoon instead. Ensure the lace is fully covered, as you don’t want to miss any knots.
- Once the bleach is applied, cover the lace with aluminum foil, but be careful not to press the foil into the bleach.
- Check the knots every 10 minutes by flipping the wig over to see if the knots are still visible. If they are, replace the foil and allow the bleach to process for another 5-10 minutes.
- Bleaching time varies, but the process typically takes 15 to 30 minutes for full effect.
Step 4: Rinse, Wash, and Care for Your Wig
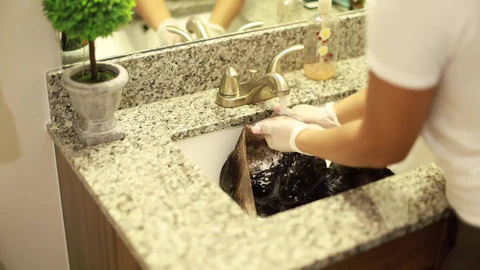
Once the knots are bleached and the black dots are no longer visible, it’s time to rinse, wash, and care for the wig.
Rinse:
- Rinse the bleach out thoroughly, making sure to hold the lace facing upwards and tilted to one side so the bleach falls away from the hair.
- Rinse the hair as well in case any bleach managed to get on it.
- Keep rinsing for a few minutes to ensure all the bleach is removed.
Wash:
- Apply neutralizing shampoo to stop the bleach from continuing to process. Ensure that both the lace and the hair are fully covered in shampoo.
- Rinse thoroughly and reapply the neutralizing shampoo, allowing it to sit for a few minutes before rinsing again.
- Next, apply purple shampoo to the wig to eliminate any brassiness from the bleach and then rinse thoroughly.
Care:
- Apply a moisturizing conditioner to both the wig and the knots, leaving it on for a few minutes before rinsing it out. This helps restore moisture and care for the knots, which may have weakened during the bleaching process.
Step 5: Dry Your Wig
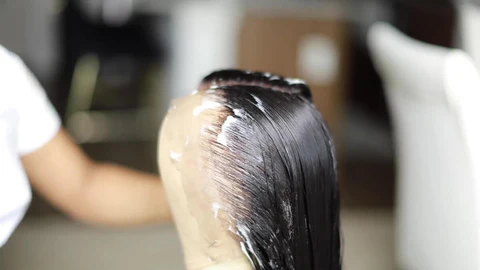
Now that your wig is clean, it’s time to dry it:
- For straight wigs, pat the wig dry with a soft towel and then proceed with your usual styling routine.
- For curly wigs, apply a moisturizing cream and let the wig air-dry naturally to maintain its texture.
And there you have it—say hello to your beautifully bleached wig knots!
Bleaching Knots on Wig Video Guide
Join Ericka J as she teaches you how to bleach knots on your wig for a flawless finish. Transform your wig and achieve a natural look with her expert tips and techniques!
What to Do If You Over-Bleach Your Knots
If you accidentally bleached your knots too much and your roots turned blonde, there’s no need to panic. Here are a couple of simple solutions to rectify the situation.
Hair Dye:
- Choose a hair dye that matches the color of your wig.
- Gather your supplies: a bowl, spoolie, and gloves.
- Follow the instructions on the packaging to mix the dye.
- Using the spoolie, carefully apply the dye directly to the over-bleached hair. Take your time to avoid staining the lace.
- Allow the dye to process for 20-30 minutes, then rinse.
- Finally, shampoo and condition the wig, and you’re all set!
Mascara: If you’re short on time, you can use a bit of mascara to temporarily cover the over-bleached areas at the roots. This quick fix will make the mistakes less noticeable, but keep in mind that you’ll need to reapply the mascara each time you wash the wig, as it’s not a permanent solution.
Alternatives to Bleaching Knots
If the knot bleaching process seems daunting, consider these alternatives:
Lace Tinting: Lace tinting involves applying makeup to the underside of the lace to change its color. Here’s how to do it:
- Turn your wig inside out and place it on a mannequin head.
- Spray the lace with Got2B Glued spray or a similar holding spray until it’s visibly wet.
- Use a blow dryer on the cool setting to dry the lace and avoid damaging it.
- Using a small makeup brush, apply powder foundation all over the lace.
- Once the wig is on, apply more foundation to the part using either liquid or powder foundation.
Use a Pre-Bleached Wig: Some wigs come with pre-bleached knots. While they may be a bit pricier than unbleached options, they are ideal for those who prefer not to bleach their knots themselves, saving you time and money on bleaching products.
For the most natural appearance, consider a Clear Lace Wig.
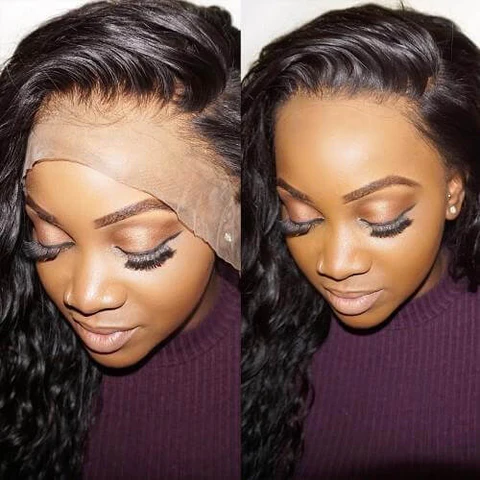
Clear Lace Wigs: At HazuHair, we offer high-quality clear lace wigs featuring clean-bleach technology. These wigs provide a more natural hairline compared to regular pre-bleached wigs, making it look like the wig is melting into your skin. With clear lace wigs, there’s no need for plucking, bleaching, or makeup application. Once you put it on, no one will believe it’s not your real hair!
If you’re still unsure about bleaching your wig’s knots, consider visiting a stylist who can professionally bleach them for you.
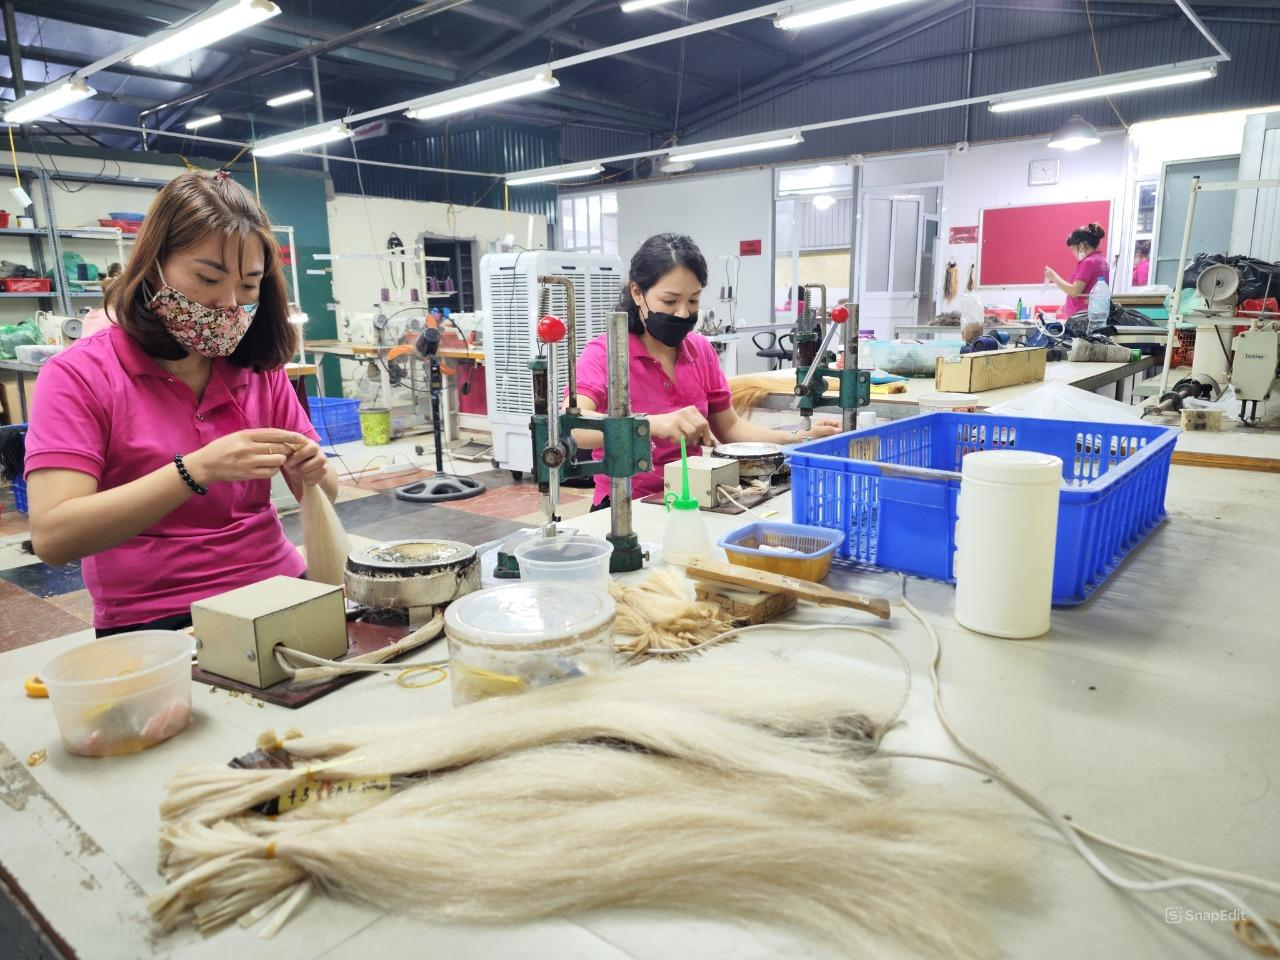
We are a trusted Vietnamese hair factory with over 100 skilled workers, offering a wide range of hair styles including wavy, curly, straight, kinky, and more.
Our products come in various colors such as natural black, ombre, blonde, red, pink, and many others.
Reach out to us today!
- Hair Factory: Tan Son 2 Village, Tan Dinh, Lang Giang, Bac Giang Province, Vietnam
- Hotline: +849 4949 3883
- Whatsapp Mrs ThanhLam: https://wa.me/84949493883
- Website: https://hazuhair.com
Bleaching Knots FAQ
How long should I leave bleach on my knots?
You should leave the bleach on your knots until they are no longer visible, typically between 15 to 30 minutes.
Do you pluck or bleach knots first?
It’s best to bleach the knots first and then pluck them. Some knots may be more resistant to bleaching than others, so after the bleaching process, you can pluck those that didn’t lighten as much.
Does bleaching knots cause shedding?
Yes, bleaching knots can lead to shedding because it weakens the internal bonds of the hair. Once these bonds are compromised, the risk of shedding increases.
Can I bleach knots twice?
You can bleach the knots twice if they remain visible after the first session. However, be aware that prolonged exposure to bleach may increase the likelihood of shedding.
What is the best bleached wig?
One of the best options for bleached wigs is XRS Beauty’s Clear Lace 13×6 Lace Front Wigs and Layed Edge Lace Wigs. These wigs feature clear lace that hides visible knots and come with a custom-designed natural-looking hairline, making them an excellent choice for a realistic appearance.
Conclusion
Bleaching the knots on your wig is an effective way to enhance the natural look of a regular lace wig. With the right techniques and some practice, you can achieve great results from the comfort of your home.
Now that you have a comprehensive understanding of the knot bleaching process, we hope you feel confident enough to give it a try. While it may seem challenging at first, it will become easier with time and practice using this guide.
Considering everything you’ve learned, do you believe that bleaching knots is worth the effort? Or would you prefer a pre-bleached wig? Share your thoughts in the comments section!
