Hair knowledge
Installation Methods for Virgin Hair Bundles: Sew-In, Glue-In, and More
A great hairstyle is defined by how you wear it and own it. When enhancing your look with Virgin Hair Bundles, the installation method is just as crucial as the quality of the hair itself. Virgin hair bundles are widely known for their superior quality, and this is elevated even further when you purchase from HazuHair. With the right installation technique, your extensions will blend seamlessly, feel natural, and last longer.
However, it’s important to consider that some methods are easier to use than others. If you’re just starting, you might prefer a simple clip-in method for convenience. As you gain more experience, you may want to explore more advanced and creative installation techniques.
Let’s take a look at some of the popular installation methods for virgin hair bundles!
What Is Virgin Hair?
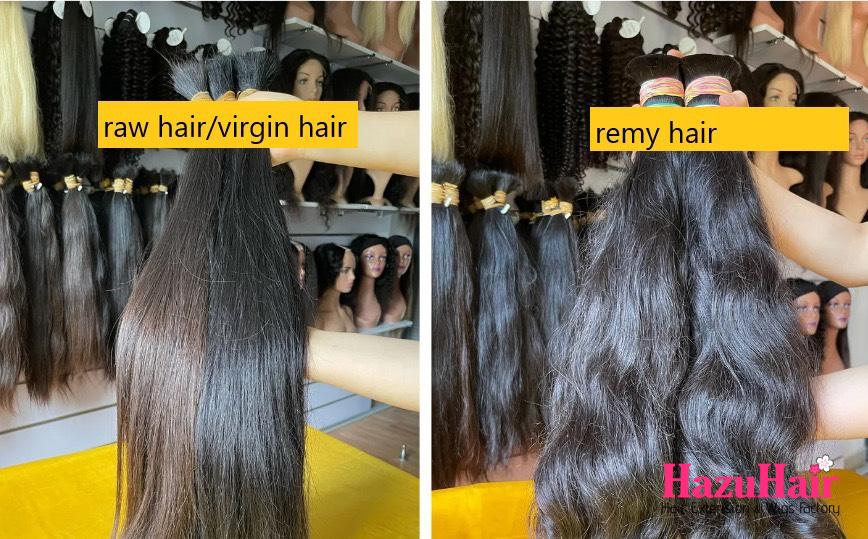
Before diving into the various installation methods for your hair extensions, it’s important to first understand what virgin hair is. The term “virgin hair” can sometimes be confused with other hair types, such as Raw Hair Bundles or Remy hair, so it’s crucial to know exactly what you’re working with before you begin the installation process.
Virgin hair refers to human hair that has never been chemically treated in any way. This means it hasn’t undergone any dyes, perms, bleaching, or other chemical processes. It is in its purest, most natural state, which makes it one of the highest-quality hair types available on the market.
Typically, virgin hair is collected from a single donor, often in countries like India, Brazil, or Vietnam, ensuring the hair is consistent in texture and quality. The hair is known for being soft, silky, and incredibly durable, offering an excellent option for those who want a long-lasting and natural look. Another major benefit of virgin hair is that it can hold color very well, giving you the option to dye it when you’re ready to change things up.
Knowing that your extensions are made of virgin hair means you can trust their quality, making them easier to manage and style, and more versatile when it comes to experimenting with different colors or styles.
Sew-In Weave Installation: A Detailed Guide
Sew-in weave installations are one of the most popular and reliable methods for adding extensions, offering a secure and long-lasting solution for those looking to enhance their hairstyle. Whether you’re installing Brazilian Kinky Yaki Bundles or any other texture, sew-ins provide the security that keeps your extensions in place until you decide to remove them. This method is particularly favored for its durability and versatility, making it a top choice for many hair enthusiasts.
Here’s a closer look at the process of a sew-in installation:
Braiding the Natural Hair
The first step in a sew-in installation involves braiding your natural hair into protective cornrows. For a flawless outcome, it’s often recommended to visit a professional stylist who specializes in sew-ins. The pattern of the cornrows can vary based on your desired style.
Popular options include circular patterns, straight-back braids, or the beehive method. The choice of braiding pattern is essential because it determines how the extensions will lay and where the part will be located. A well-executed braid pattern ensures a seamless look and provides a comfortable foundation for the extensions.
Sewing the Bundles onto the Braids
Once your natural hair is braided, the next step is sewing the virgin hair bundles into place. This process involves using a needle and durable thread (usually nylon) to secure the wefts of hair onto the braids.
The thread is stitched through the braids, creating a snug and secure attachment for the extensions. This method ensures that the hair stays in place for weeks, without worrying about slipping or shifting.
Finishing Touches and Styling
After the bundles are sewn in, the final step is to style the extensions as desired. Whether you want sleek, straight hair, bouncy curls, or voluminous waves, the sew-in method offers incredible versatility in styling. Once the hair is styled, you can achieve a natural look that blends perfectly with your own hair, giving you a flawless finish.

Glue-In (Quick Weave) Installation: A Detailed Overview
The glue-in, also known as a quick weave, is another popular method for installing hair extensions. It’s widely appreciated for its speed and ease of application, making it an excellent option for anyone looking for a fast and efficient way to change their look. However, while it may seem like a simple solution, careful handling is essential to avoid damaging your natural hair. This method provides a versatile way to achieve a variety of hairstyles, but it’s important to follow the proper steps for the best results.
Preparation: The Foundation
The first step in a glue-in installation involves preparing your natural hair for the extension application. Your natural hair is either braided or laid flat against your scalp, depending on the desired outcome. Some people prefer to braid their hair into cornrows, while others opt for flat, straightened hair.
Once your hair is prepared, a protective cap is placed over your head. This cap serves as a barrier between the glue and your natural hair, helping to protect it from any potential damage caused by direct contact with the adhesive. The protective cap ensures that the glue adheres only to the cap and not to your natural strands.
Application: Installing the Wefts
After preparing your natural hair and placing the protective cap, the next step is to apply the hair wefts. The hair wefts are measured and cut to the desired length, ensuring that each piece fits the area it’s intended for. Once the wefts are ready, they are glued onto the cap using a high-quality lace adhesive like Lace Paste Xtra Hold. This type of glue is specifically designed to provide a strong and long-lasting bond, ensuring that your extensions stay securely in place.
While some people may choose to apply the glue directly to their natural hair for a more direct installation, this method can be riskier and may cause damage to your hair over time. Applying the glue to the protective cap instead is a safer and more effective approach, as it minimizes the risk of adhesive residue or damage to the natural strands.
Finishing: Styling Your New Look
Once all the wefts are glued in place, the final step is to style your new hair. The glue-in method is fast, which makes it ideal for anyone needing a quick transformation for a special occasion or an effortless style change. You can achieve sleek and straight looks, bouncy curls, or voluminous waves with this method. Since the extensions are glued to the cap, they blend seamlessly with your natural hair, giving you a natural-looking finish that looks full and luxurious.
The glue-in installation offers a lot of versatility in terms of styling. You can experiment with various looks, from sophisticated and polished to more textured or edgy styles. It’s perfect for those who want to switch up their look quickly without the long-term commitment of more permanent hair extensions.
Crochet Weave Installation: A Fun and Quick Method
The crochet weave method has recently made a strong return, and it’s easy to see why. It’s a fun, efficient, and cost-effective way to install hair extensions that almost anyone can do on their own. By choosing the crochet method, you can save money on salon visits and achieve a stylish, seamless look from the comfort of your own home.
Preparation: Braiding Your Natural Hair
To begin the crochet weave installation, start by braiding your natural hair into straight-back cornrows. The cornrow pattern serves as the foundation for the extensions, providing a secure base for the crochet needle to work through. If you’re aiming for a voluminous, curly hairstyle, cornrowing your hair straight back is essential.
For bigger or curly hair looks, this braid pattern will help hide the loops of the extensions, ensuring a flawless finish. This method is especially great for textured hair extensions, as the loops blend perfectly with the natural style.
Crocheting: Adding the Hair Extensions
The crochet technique itself is simple but effective. You’ll need a crochet needle to apply the extensions. Once your natural hair is braided, use the crochet needle to loop the hair extensions through the cornrows. Insert the crochet needle under a braid, slide the extension onto the hook, and pull the hair through the braid.
Once the extension is through, close the latch on the needle to secure it in place. Repeat this process across your cornrows, adding hair extensions until the desired fullness and length are achieved.
Styling: Creating Your New Look
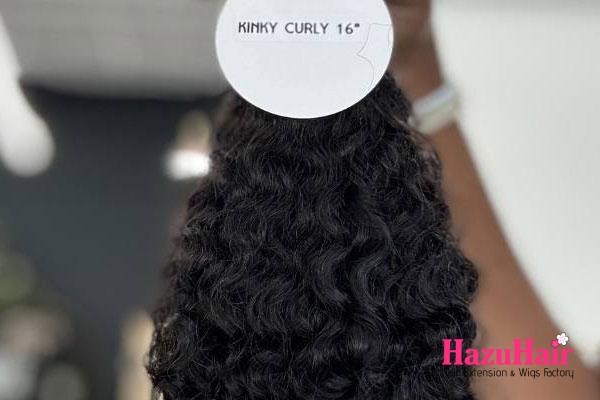
After the crochet extensions are added, it’s time to style them to your liking. This method works particularly well with Kinky Curly or textured hair extensions, as the loops blend seamlessly with the natural curl pattern, giving you a full, voluminous look. The best part about the crochet weave method is its versatility whether you want a sleek, straight look or big, curly hair, this technique allows for various styling options.
Clip-in extensions offer unparalleled flexibility when it comes to hairstyling. Whether you’re looking to enhance your look for a special occasion, add volume and length, or just experiment with a different style, clip-ins are the perfect solution. They are particularly ideal for people seeking a temporary transformation without the long-term commitment of other methods, making them perfect for seasons like summer or events where you want a quick and easy makeover.
Clip-In Extensions: The Ultimate in Flexible Hairstyling
Clip-in extensions offer unparalleled flexibility when it comes to hairstyling. Whether you’re looking to enhance your look for a special occasion, add volume and length, or just experiment with a different style, clip-ins are the perfect solution. They are particularly ideal for people seeking a temporary transformation without the long-term commitment of other methods, making them perfect for seasons like summer or events where you want a quick and easy makeover.
Preparation: Sectioning Your Hair for a Seamless Application
To achieve the best results with clip-in extensions, it’s important to start by preparing your natural hair. First, part your hair where you want the extensions to be applied.
This could be anywhere from the nape of your neck to higher sections, depending on where you want extra volume or length. Sectioning your hair properly is key to ensuring the extensions blend seamlessly with your natural hair and stay hidden.
Application: Easy and Secure Attachment
Clip-in extensions come pre-attached with small, durable clips that allow for a quick and secure application. Once your hair is parted and sectioned, you simply clip the wefts into place, starting from the bottom and working your way up.
The clips are designed to attach directly to the scalp, and once in place, you just snap them shut to ensure a secure hold. This method is not only fast but also gentle on your natural hair, as it does not involve any adhesive or chemical treatments.
Styling: Blend and Transform Your Look
One of the biggest advantages of clip-in extensions is that they can be styled just like your own natural hair. Whether you want sleek, straight strands, voluminous curls, or soft waves, clip-ins can be easily incorporated into any hairstyle.
The best part? They are easily removable at the end of the day, so you can enjoy your new look for a short time without making any permanent changes to your hair. Just unclip each piece, and you’re back to your original style in minutes.
Tape-In Extensions: Effortless and Seamless Hair Enhancement
Tape-in extensions are quickly becoming one of the most sought-after methods for achieving fuller, longer hair thanks to their natural, seamless look and straightforward installation process. These extensions are designed to provide a smooth, undetectable finish, giving you the volume and length you desire without the bulkiness often associated with other extension types.
Tape-in extensions use a special adhesive tape to sandwich your natural hair between two strips of extension hair, creating a secure and seamless bond. Here’s a step-by-step guide on how to install these extensions using virgin hair bundles:
Installation Process for Tape-In Extensions:
- Section Your Hair: Begin by dividing your natural hair into manageable sections. Using clips or hair ties, separate the top layer of your hair from the bottom, working with one section at a time. This will ensure the extensions are applied evenly and without any gaps.
- Peel Off the Tape’s Backing: Take the first tape-in extension and carefully peel off the backing of the adhesive tape. Be careful not to touch the sticky part of the tape with your fingers, as this could reduce its effectiveness.
- Place the Extension on Your Hair: Position the adhesive side of the extension directly onto a section of your natural hair, close to the roots. Ensure that the extension lies flat and even with your hair, blending seamlessly.
- Secure the Extension: Next, take another weft of hair with adhesive tape and place it directly on top of the first, effectively sandwiching your natural hair between the two tapes. Press both wefts firmly together to ensure a strong, secure bond. Repeat this process for each section of your hair until you’ve achieved your desired look.

Virgin Hair Bundle Maintenance Tips for Long-Lasting Beauty
Caring for your virgin hair bundles is essential to maintaining their beauty and longevity. Although it might be tempting to toss your extensions aside after wearing them, proper maintenance is key to ensuring they stay soft, shiny, and looking their best. Here are some simple yet effective tips to keep your virgin hair bundles in top condition:
- Wash Gently: To preserve the natural oils and texture of the hair, always use sulfate-free shampoos and conditioners. These products are gentler on the hair and will help maintain the softness and smoothness of your virgin hair. Wash your extensions every 1-2 weeks, depending on how often you wear them.
- Detangle Regularly: Prevent tangling and breakage by gently detangling your extensions. Use a wide-tooth comb or a detangling brush, starting at the tips of the hair and working your way up to the roots. Always be gentle to avoid causing any damage to the hair.
- Avoid Heat Damage: While heat styling tools like straighteners and curling irons can help you achieve various looks, overuse can lead to dryness and breakage. To prevent heat damage, try to limit the use of such tools. When you must use them, always apply a heat protectant spray to shield the hair from the harmful effects of high temperatures.
- Moisturize: Just like your natural hair, extensions need moisture to stay hydrated and soft. Use leave-in conditioners or natural hair oils to keep your bundles nourished and shiny. Regular moisturizing helps prevent dryness and maintains the hair’s smooth texture.
- Protect at Night: To minimize friction and prevent breakage while you sleep, always wrap your hair in a silk or satin scarf. Alternatively, you can use a silk pillowcase. These materials help reduce the risk of frizz and tangling, ensuring your hair stays looking fresh and manageable overnight.
- Professional Maintenance: To maintain the longevity of your virgin hair bundles, it’s important to visit a stylist for regular check-ups and adjustments. A professional can help ensure that your extensions remain in good condition and that the installation stays secure. Regular maintenance also helps extend the life of your virgin hair bundles, so you can enjoy beautiful, healthy hair for longer.
Which Installation Method Will You Choose?
Virgin hair bundles offer endless styling possibilities, and with the right installation technique and proper care, you can enjoy gorgeous, long-lasting results.
The best part is, HazuHair Virgin Hair Bundles are compatible with various installation methods, whether you prefer a sew-in, glue-in, or other options.
If you find the process challenging, don’t hesitate to consult a professional stylist. They can help you choose the best installation method suited for your hair type and lifestyle, ensuring optimal results every time.
and…
If you’re looking to buy high-quality wigs or hair extensions, look no further than HazuHair.
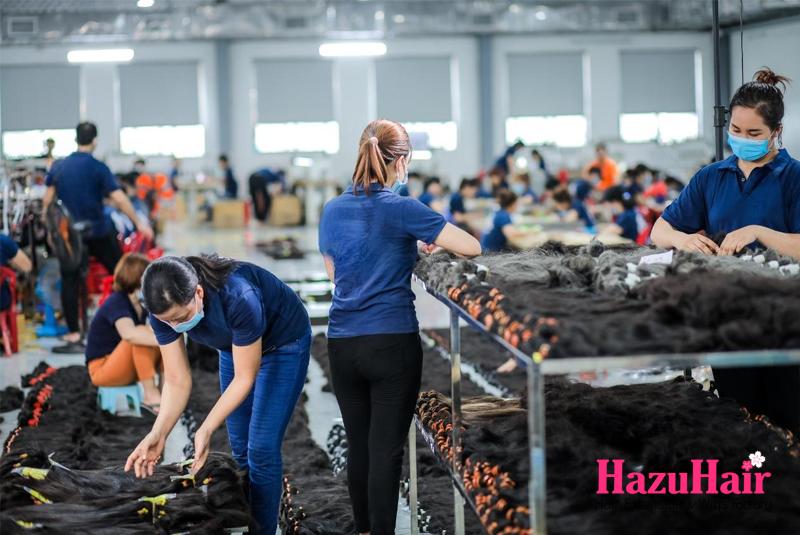
We are a trusted Vietnamese hair factory with over 100 skilled workers, offering a wide range of hair styles including wavy, curly, straight, kinky, and more.
Our products come in various colors such as natural black, ombre, blonde, red, pink, and many others.
Reach out to us today!
- Hair Factory: Tan Son 2 Village, Tan Dinh, Lang Giang, Bac Giang Province, Vietnam
- Hotline: +849 4949 3883
- Whatsapp Mrs ThanhLam: https://wa.me/84949493883
- Website: https://hazuhair.com