Hair knowledge
Installing Deep Wave Frontal Wigs: Tips for a Flawless Finish
The introduction of Deep Wave Frontal Wigs has transformed the hair styling industry, making it easier than ever to achieve a stunning and sophisticated look. These wigs are defined by their well-structured, voluminous curls, which deliver a natural flow and effortlessly enhance any hairstyle.
When installed correctly, deep wave frontal wigs blend seamlessly with the natural hairline, creating an undetectable, flawless finish. This combination of natural texture and realistic appearance makes them a go-to choice for hair enthusiasts seeking versatility and style.
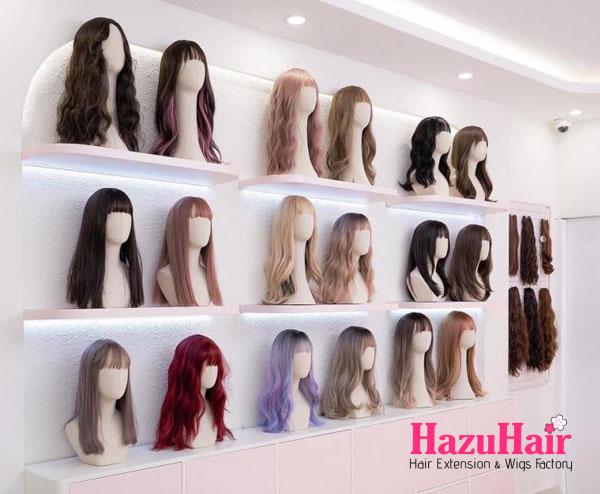
For those looking to elevate their hair game, HazuHair Extensions offers premium-quality deep wave frontal wigs, available both online and in-store. Their wigs cater to a variety of preferences, ensuring that customers achieve their desired look with ease.
However, proper installation is key to maximizing the wig’s benefits. A secure and precise fitting around the scalp ensures a smooth, natural transition, making the wig virtually indistinguishable from real hair. This guide will provide a detailed step-by-step process for installing deep wave frontal wigs. Additionally, it will include essential tips and tricks to help you maintain a flawless, long-lasting look, no matter the occasion.
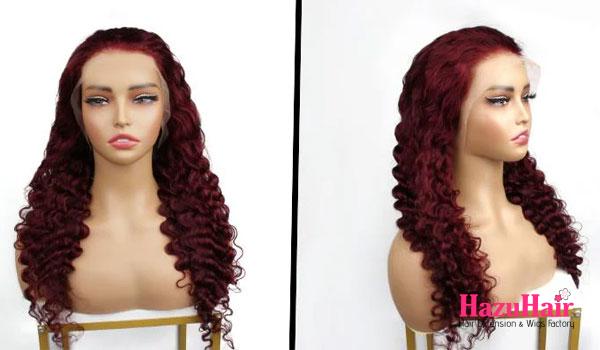
Deep Wave Frontal Wigs
Deep Wave Frontal Wigs have quickly become one of the most sought-after innovations in the world of hair extensions, offering a perfect balance of style, versatility, and natural appearance. These wigs feature a delicate lace frontal that extends from ear to ear, providing broader coverage and enhancing parting flexibility. This lace frontal mimics the natural hairline, creating a realistic look that seamlessly blends with your scalp.
What truly sets deep wave frontal wigs apart is their stunning deep wave texture. The well-defined, voluminous curls closely resemble natural hair, giving the wig a luxurious, full-bodied appearance. This makes them ideal for achieving glamorous styles while maintaining a natural and effortless aesthetic.
To ensure a secure and comfortable fit, deep wave frontal wigs are equipped with built-in adjustable straps and combs. These features allow users to customize the wig’s tightness, ensuring it stays firmly in place throughout the day, no matter the occasion.
One of the biggest advantages of deep wave frontal wigs is their versatility. From sleek ponytails and middle parts to side parts and voluminous curls, they allow users to experiment with numerous hairstyles and customizations. Whether you’re preparing for a formal event or looking for a casual, chic appearance, deep wave frontal wigs offer the perfect solution for all your styling needs.

>>>I Just Got Sew-In Hair Extensions and They Hurt, Help!
Installing the Deep Wave Frontal Wig
Installing a deep wave frontal wig is a straightforward process but requires precision to achieve a flawless and natural result. Below is a comprehensive step-by-step guide to ensure a seamless installation.
Materials You Need
Before starting, gather the following essential materials:
- Deep Wave Frontal Wig
- Wide-Tooth Comb
- Alcohol Pads
- Wig Glue or Adhesive
- Tweezers
- Scissors
- Edge Control Gel
- Styling Tools (e.g., flat iron, curling wand)
Step 1: Preparation
Preparing your natural hair and the wig is crucial for a smooth installation process. Follow these steps:
- Clean and Condition Your Natural Hair
- Wash your hair using a mild sulfate-free shampoo to remove all dirt, oil, and product buildup.
- Deep condition to restore moisture and ensure your hair remains healthy underneath the wig.
- Dry your hair thoroughly before proceeding.
- Create a Flat Base
- Braid your natural hair into small cornrows or flat braids to reduce volume and create a smooth, flat base.
- The flatter the base, the more natural the wig will look when installed.
- Clean the Hairline
- Use alcohol pads to gently clean your hairline and scalp, removing any oil or residue.
- This step ensures the wig adhesive adheres properly to your skin.
Step 2: Wig Preparation
Preparing the deep wave frontal wig properly before installation is vital for achieving a realistic appearance. Follow these key steps:
- Customize the Lace
- Place the wig on your head to see where the lace aligns with your natural hairline.
- Use sharp scissors to carefully trim away the excess lace, leaving about 1/4 inch of lace along the hairline.
- For a natural look, pluck the hairline with tweezers to create a more realistic, gradual density.
- Adjust the Wig Fit
- Use the built-in adjustable straps and combs to secure the wig to your head size.
- The wig should fit snugly but not too tight. Adjust until you achieve a secure and comfortable fit.
- Pre-Style the Wig
- Before securing the wig, pre-style it to avoid applying unnecessary pressure once it’s installed.
- You can straighten the wig, enhance the deep waves, or define the hair parting as desired.
Step 3: Installation
Once preparation is complete, proceed with installing the deep wave frontal wig:
- Apply Adhesive or Wig Glue
- Apply a thin layer of wig glue or adhesive along your hairline, avoiding excess application.
- Allow the adhesive to become tacky (wait for about 30-60 seconds).
- Position the Wig
- Carefully position the wig’s lace frontal onto the tacky adhesive, aligning it with your natural hairline.
- Press the lace down gently, starting from the center and moving outward to the edges for a seamless fit.
- Secure the Wig
- Press the lace down firmly with your fingers or a fine-tooth comb to ensure it adheres well.
- Use the adjustable straps and combs inside the wig for added security.
- Blend the Hairline
- Use edge control gel or mousse to style and lay your natural edges, blending them with the wig’s frontal.
- This step creates a more polished and natural look.
Step 4: Final Styling
Once the wig is installed, you can finalize the styling to suit your preferences:
- Use a wide-tooth comb to detangle the deep waves gently.
- Define the curls with a curl-defining cream or mousse for a more polished appearance.
- For versatility, you can create middle parts, side parts, or even tie the wig into ponytails or buns.

>>>How to Preparing for a Perfect Sew-In Installation
Comprehensive Guide to Installing a Deep Wave Frontal Wig
Installing a deep wave frontal wig requires careful preparation and precision to ensure a flawless, natural look. Below is a detailed step-by-step guide for a seamless installation process using lace glue, tape, or adhesive spray:
Preparing the Hairline
- Begin by prepping your natural hair and scalp. Braid your hair down or flatten it using a wig cap to create a smooth base.
- Clean the skin around your hairline using an alcohol wipe to remove any oil, dirt, or residue. This step ensures the adhesive adheres securely to your skin.
Choosing the Adhesive Method
You can choose between lace glue, double-sided wig tape, or adhesive spray depending on your desired level of hold.
- Lace Glue for Maximum Hold:
- Apply a thin, even layer of lace glue along the edge of your natural hairline. Start from one temple and work your way across to the other side.
- Let the glue become tacky (semi-dry) by waiting 2–3 minutes. You can use a blow dryer on a cool setting to speed up this process.
- Adhesive Spray for Temporary Hold:
- If you opt for adhesive spray, follow the same process as lace glue: spray a thin layer directly along the hairline, ensuring it is even and not overly saturated.
- Allow the spray to become slightly tacky before moving to the next step.
- Double-Sided Tape for a Clean, Secure Bond: Cut small strips of double-sided wig tape and apply them evenly along your hairline. Press the tape firmly onto your skin to ensure it sticks securely.
Attaching the Frontal Wig
- Once the adhesive is ready, carefully place the wig on your head, ensuring it aligns perfectly with your natural hairline. Start by positioning the center of the wig along your forehead and gradually press it outward toward the sides.
- Work slowly to ensure proper placement and symmetry, as rushing may create uneven spots or misalignment.
Securing the Wig
- Press the wig firmly onto the adhesive (glue, spray, or tape) using your fingertips or a tail comb. Pay extra attention to the edges to ensure they lay flat against your skin.
- Use the tail end of the comb to gently press down any areas that may lift, and smooth out folds, bubbles, or uneven spots.
Perfecting the Fit
- Check for any gaps or loose sections around the hairline and gently press them into place. Smooth the wig using a comb, starting from the center and working outward, to ensure a seamless, natural appearance.
- To create a stronger bond, wrap a silk or elastic band around the perimeter of the wig for 5–10 minutes. This helps the adhesive set properly and secures the frontal firmly to your hairline.
Final Adjustments
- Style the wig as desired, whether it’s creating baby hairs, parting the hair, or defining the deep wave curls with a light spray of water or styling mousse.
- If needed, trim any excess lace for a clean, natural finish.

>>>6 Different Ways to Install Your Weave (Sew-In Hair Extensions) for Gorgeous Hair
Wig Blending and Styling
Once you have secured your deep wave frontal wig, blending and styling are essential for achieving a flawless, natural look.
To blend the lace seamlessly with your skin tone, apply foundation, concealer, or lace tint in a shade that matches your complexion. Use a makeup brush or sponge to evenly distribute the product along the lace edges. For added refinement, apply edge control of a similar color to smooth the hairline and further disguise the lace. This technique creates a seamless transition between the wig and your scalp.
Next, pluck the hairline to mimic the natural density of your real hairline. Place the wig on a mannequin head for better control. Use sharp tweezers to gently pluck individual strands, focusing on areas that appear unnaturally dense. Be careful not to over-pluck, as it can create bald spots and disrupt the natural appearance. Once satisfied, style baby hairs with edge control to complete the realistic finish.
For styling the deep wave pattern, you can enhance its texture or customize the look for any occasion. To define the waves, lightly spray the hair with water and apply a curl-defining mousse or cream. Gently scrunch the hair with your fingers to maintain the curls. If you prefer a sleeker look, use a flat iron to straighten the wig. Alternatively, a curling iron can refresh or reshape the waves.
Additionally, the wig can be trimmed to create bangs or frame the face, adding a personalized touch. Accessorize with clips, headbands, or decorative pins to elevate the overall appearance.
With proper blending and styling, your deep wave frontal wig will look natural, versatile, and effortlessly beautiful.

Tips for Achieving a Natural and Secure Fit
To achieve a flawless and natural look with deep wave frontal wigs, it’s essential to ensure proper installation and a secure fit. Follow these tips for the best results:
- Customize the Wig for Realism
- Pluck the wig’s hairline to match your natural hair density, creating a more natural transition.
- Blend the lace with your skin tone using foundation, concealer, or lace tint spray. Focus on the edges for a seamless finish.
- Prepare Your Hair Before Installation
- Cleanse and dry your natural hair and scalp thoroughly to remove oils or residue. This ensures better adhesion of the wig adhesives.
- Braid or flatten your natural hair underneath the wig cap to create a smooth foundation for installation.
- Use High-Quality Adhesives
- Opt for premium wig glues, tapes, or adhesive sprays, such as those from reliable brands like HazuHair Extensions. These products offer strong, long-lasting hold without damaging the scalp.
- Apply adhesives carefully along the hairline and let them dry until tacky before pressing the wig into place.
- Protect the Wig and Natural Hair
- At night, wrap the frontal wig in a silk or satin scarf to minimize friction and prevent tangling.
- Avoid getting adhesive on your natural hair to preserve its health and integrity.
- Store the Wig Properly: When not in use, place the wig on a wig stand in a cool, dry environment. This helps maintain the wig’s shape and prevents tangling.
- Seek Professional Help: If you’re a beginner, consult a professional stylist for installation. Their expertise will ensure a precise, secure fit and flawless finish.
>>>Is a Partial Sew-In Better than a Traditional Sew-In?
Achieving a Flawless Finish with Deep Wave Frontal Wigs
To achieve a natural and realistic look with HazuHair deep wave frontal wigs, mastering the installation process and seamless blending is crucial. The detailed steps provided in the procedure cleaning, creating a base, customizing, and securing the wig are essential for achieving a secure and comfortable fit.
For the best results, it’s important to follow these steps meticulously. Begin by thoroughly cleaning your natural hair and scalp to remove any oils or residues that could affect the wig’s adhesive. This ensures that the adhesives, whether lace glue, tape, or adhesive spray, can bond effectively to your skin.
Creating a smooth base for the wig is also vital. Braid or flatten your natural hair to provide a flat surface for the wig cap. This step helps minimize bulk and provides a secure foundation for the wig installation. Customization is key to achieving a natural look. Pluck the hairline of the wig to match your natural hair density and blend the lace with your skin tone using foundation, concealer, or lace tint spray. This will create a seamless transition from your scalp to the wig.
Securing the wig properly is the final step. Apply the selected adhesive carefully along the hairline, letting it dry until tacky before pressing the wig into place. This helps prevent slipping and provides a strong, long-lasting hold. Styling the wig is where you can really personalize your look. The deep wave pattern can be enhanced with a curling iron or kept sleek with a flat iron. The versatility of the wig allows you to change your style according to the occasion.
The most important aspect for achieving a flawless finish is selecting high-quality adhesives. Using reliable products from trusted brands like HazuHair Extensions will ensure that your deep wave frontal wig stays securely in place while providing a natural, realistic look. With these steps and tips, you can confidently flaunt the deep wave style with no worries about the wig slipping or appearing unnatural.
and…

If you’re looking to buy high-quality wigs or hair extensions, look no further than HazuHair.
We are a trusted Vietnamese hair factory with over 100 skilled workers, offering a wide range of hair styles including wavy, curly, straight, kinky, and more.
Our products come in various colors such as natural black, ombre, blonde, red, pink, and many others.
Reach out to us today!
- Hair Factory: Tan Son 2 Village, Tan Dinh, Lang Giang, Bac Giang Province, Vietnam
- Hotline: +849 4949 3883
- Whatsapp Mrs ThanhLam: https://wa.me/84949493883
- Website: https://hazuhair.com