Hair knowledge
Get Started with DIY Boho Braids: Easy Techniques and Tips
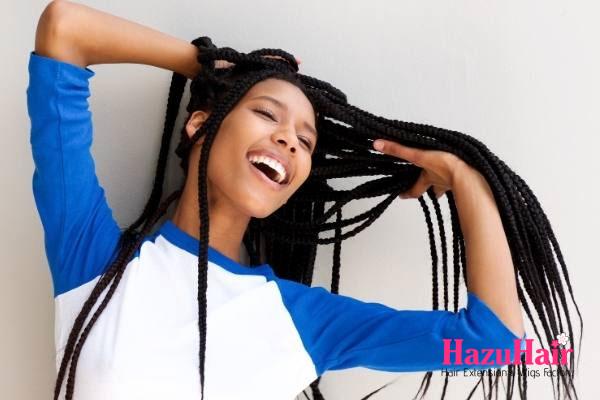
Human hair boho braids have become incredibly popular, and it’s easy to see why they offer a natural, stylish look and are far easier to maintain than synthetic alternatives. Synthetic hair tends to tangle and fray, making human hair the go-to choice for those seeking durability and elegance.
In this guide, we’ll help you navigate the essentials of boho braids, starting with the best types of human hair to buy. Whether you’re looking for a sleek finish or a more voluminous texture, we’ll guide you in selecting the perfect hair to match your desired look and ensure long-lasting results.
You’ll also find a comprehensive, step-by-step tutorial on the installation process. Whether you’re a beginner trying it out at home or consulting a professional stylist, our guide will simplify the process and highlight key techniques for a flawless finish.
To keep your braids looking fresh and beautiful, we’ll wrap up with essential maintenance tips. From cleaning and moisturizing to nighttime care, you’ll learn how to protect your braids and extend their wear. With this guide, you’ll be fully equipped to rock your human hair boho braids with confidence and ease!
Choosing the Right Hair for Boho Braids
Creating stunning Bohemian braids starts with selecting the perfect hair, as this choice significantly impacts the longevity and overall appearance of your style. While your budget plays a role, investing in high-quality hair is well worth it for a flawless and durable finish.
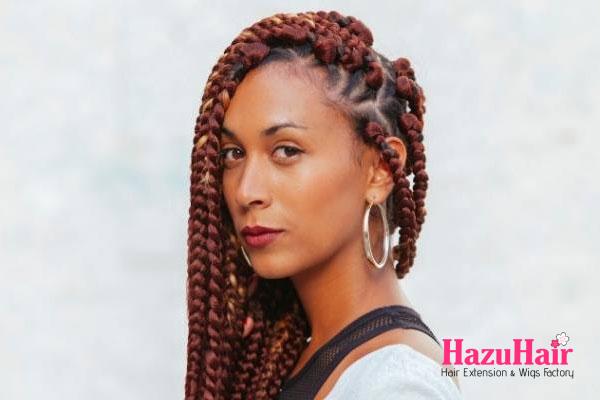
For the best results, consider pre-braided options that blend deep-wave human hair with human braiding hair. This combination offers the ideal balance of aesthetics and practicality. The deep-wave texture provides a natural, flowing look, while the braiding hair ensures structure and ease of installation.
Pre-twisted options are particularly advantageous, as they streamline the braiding process and reduce prep time. This means not only a smoother installation but also less hassle when it comes to maintaining your style.
While human hair may come with a higher price tag, its superior quality, natural appearance, and longer lifespan make it a smart investment. High-quality human hair retains its texture and shape better over time, saving you from frequent replacements and ensuring your Boho braids look fabulous for weeks.
Choose wisely, and you’ll enjoy a head-turning style that’s as effortless to maintain as it is beautiful.
Preparing Your Hair for Braiding
Before beginning the braiding process, take these essential steps to ensure your natural hair is ready:
- Cleanse Thoroughly: Use a clarifying shampoo to eliminate any buildup from your scalp and hair.
- Deep Condition: Moisturize your hair deeply to enhance its strength and flexibility, minimizing breakage during the braiding process.
- Blow-Dry with Care: Blow-dry your hair completely to prevent any trapped moisture that could lead to mold or mildew in your braids.
- Gather Your Tools: Prepare everything you’ll need, such as a rat-tail comb, hair clips, gel, edge control, hair mousse, a water/conditioner mix, hair spray, and scissors.
Starting the Installation Process
- Parting and Sectioning Your Hair:
- Begin by dividing your hair into manageable sections.
- Create two horizontal rows at the base of your head, spanning from ear to ear.
- Continue making horizontal rows as you work upward, eventually reaching the front of your head. Aim for at least six rows on each side and two at the bottom.
- Neat and Polished Sections:
- Apply hair gel to the top, bottom, and sides of each part to achieve a sleek appearance.
- Use a brush to smooth the gel into place, ensuring the sections look tidy and well-defined.
Taking the time to section your hair carefully may seem tedious, but it lays the foundation for a polished, professional-looking braid installation.

Beginning the Braid: A Step-by-Step Guide
Starting a braid at the base of your head can feel like a creative and rewarding process. Here’s a detailed breakdown to guide you through it:
- Prepare the Hair: Begin by sectioning off a portion of hair at the nape of your neck. Ensure the hair is smooth and tangle-free by brushing or combing it gently. This will make the braiding process easier and result in a cleaner look.
- Divide into Three Parts: Take the section of hair you’ve prepared and split it into three equal strands. Try to ensure each strand is of similar thickness for an even braid.
- Start the Basic Braid: Using only your natural hair, begin a classic three-strand braid:
- Cross the right strand over the center strand.
- Then, cross the left strand over the new center strand.
- Repeat this process, alternating sides.
- Count the Crossovers: As you braid, count each crossover. This helps track your progress and keeps the braid uniform. Once you’ve completed four crossovers (two from each side), pause the braid.
- Incorporate the Extra Hair: Now it’s time to add the first piece of additional braiding hair:
- Take a small section of the extra hair and gently integrate it with one of your three strands. Start with a smaller piece for a smoother transition and to maintain control.
- Continue braiding normally for a few crossovers to secure the added hair.
- Repeat the Process: After securing the first added section, continue braiding and periodically add more pieces of extra hair as you progress down the braid. Add hair in small amounts each time to create a natural and seamless blend.
This method ensures a polished and professional-looking braid while giving you the flexibility to adjust the thickness and style as you go. Practice makes perfect, so take your time and enjoy the process!
Adding Hair to Your Braid: A Detailed Guide
Incorporating additional braiding hair into your braid can elevate the style and add volume. Here’s an expanded step-by-step guide to ensure your braid looks smooth and well-blended:
- Start with a Small Piece: When you’re ready to introduce braiding hair, begin with a small section. Starting small allows for a more natural transition and ensures the braid doesn’t feel bulky at the base.
- Weave It In: Gently incorporate the small piece of braiding hair into one of the three strands of your braid. Make sure the additional hair is evenly distributed to avoid any lumps or unevenness.
- Plait Four Times: Continue braiding as usual, crossing each strand over the center while counting to four crossovers (two from each side). This step ensures the added hair is securely integrated into the braid.
- Add Another Piece: Once you’ve completed four crossovers, it’s time to add a second small piece of braiding hair. Follow the same process:
-
- Take a small section of the additional hair.
- Weave it into one of the strands.
- Plait the braid another four times to secure it.
- Repeat for a Total of Three Additions: Repeat the process of adding hair and plaiting four times one more time, for a total of three small pieces of braiding hair added. By spacing out the additions, you create a gradual buildup of volume, resulting in a more natural and seamless look.
- Secure and Blend: With each addition, ensure the braiding hair is firmly secured and blends smoothly with your natural hair. Use gentle tension to avoid damaging your hair or creating an uneven braid.
- Why This Method Works: This method of adding small sections of braiding hair at intervals ensures:
-
- A secure hold on the added hair, preventing it from slipping out.
- A smooth and gradual transition, making it difficult to distinguish between your natural hair and the braiding hair.
- A polished yet boho-inspired look that enhances the overall appearance of your braid.
Take your time during this process, especially if you’re new to adding braiding hair. With practice, you’ll develop a rhythm that results in beautiful, well-blended braids every time!
Incorporating Kinky Curly Human Hair: Step-by-Step Instructions
Adding Kinky Curly Human Hair to your braid is a key step in achieving the signature boho look, as it adds texture, volume, and flair. Here’s a detailed guide to help you seamlessly integrate this hair into your braid:
- Prepare for the Curly Hair Addition: After incorporating the braiding hair into your braid, continue braiding until both the left and middle strands contain one piece of the braiding hair. This creates a stable foundation and ensures your braid is balanced before adding the curly hair.
- Select a Small Piece of Kinky Curly Hair: Choose a small section of Kinky Curly Human Hair. The size of the piece depends on how much texture and volume you want to add, but starting with a modest amount will help keep the look natural and manageable.
- Position the Curly Hair in the Braid: Take the curly hair and weave it into the braid by combining it with one of the three strands. Align the added curly hair with the strand’s natural flow to make the integration seamless.
- Secure by Braiding Tightly: Once the curly hair is in place, braid tightly for at least four crossovers (two from each side). This step locks the curly hair into the braid, preventing it from slipping out. Be sure to maintain firm but gentle tension to keep the braid secure without causing damage to your natural hair or the extensions.
- Create the Boho Texture: As you continue braiding, the curly hair will naturally begin to create a bohemian texture. Its unique shape and volume will stand out against the smoothness of the braiding hair, giving your braid that effortlessly chic, textured appearance characteristic of boho styles.
- Repeat as Needed: Depending on the length of your braid and the look you’re going for, you can add more sections of curly hair at intervals. This builds dimension and ensures the curly texture is evenly distributed throughout the braid.
- Why This Step is Crucial: Incorporating Kinky Curly Human Hair is what sets boho braids apart from traditional braids. The textured curls add a whimsical, free-spirited vibe that elevates the overall style. By braiding tightly and strategically placing the curly hair, you can ensure the texture looks natural and stays secure throughout the day.
Take your time to experiment with placement and hair amounts until you achieve your desired look. With practice, you’ll master the art of blending textures to create stunning, personalized boho braids!

Continuing the Braid: Organizing and Customizing
As you progress with your braid, it’s important to stay organized and thoughtful about where and how you’re adding curly hair and braiding hair. Here’s a detailed guide to help you:
- Keep Track of Curly Hair Additions: Each time you add a piece of curly hair, take a moment to locate it within the braid. The distinctive texture of the curly hair makes it easy to spot, even as the braid grows longer.
- Use Clips for Organization: To maintain control and organization, clip the curly hair pieces in place once they’re added. This prevents them from blending too much into the braid and ensures they remain visible. It also helps you keep track of how many pieces you’ve added and where they’re positioned.
- Balance the Additions: For each braid, you can add 3 to 4 pieces of curly hair, along with the same number of regular braiding hair sections. The exact amount will depend on the desired thickness and the style you’re going for.
- Consider Thickness and Weight:
-
- Thicker Braids: Adding more hair (both curly and regular) will result in fuller, more dramatic braids. This can create a bold, statement-making look.
- Comfort: Keep in mind that thicker braids also mean added weight. If you plan to wear the braids for an extended period, ensure the weight feels comfortable on your scalp.
- Moderation: If you prefer lighter, more delicate braids, stick to fewer hair additions.
- Customize to Your Preference: As you continue braiding, periodically step back and assess the look of your braid. Are the curly hair pieces spaced evenly? Do they create the desired texture and volume? Adjust as needed to align with your vision.
- Tips for a Polished Finish
-
- Alternate the placement of curly and regular braiding hair to maintain balance.
- Distribute the curly pieces evenly throughout the braid for a cohesive and professional look.
- Avoid overloading a single braid with too much hair, as this can strain your natural hair and scalp.
Securing the Braid: Step-by-Step Guide
Once you reach the end of your braid, it’s time to secure it properly to ensure it stays in place and looks polished:
Create a Loop
- Take the braiding hair and wrap it around itself to form a small loop.
- Pull the end of the braid through this loop. This technique helps to create a neat and tidy finish.
Use Adhesive for Added Security
- Apply some lace frontal glue or adhesive along the underside of the braid to secure it further.
- This will prevent any unruly hairs from slipping out and keep the braid intact.
Trim Stray Hairs
- Check for any stray hairs sticking out from the braid.
- Use scissors to carefully trim these hairs to maintain a clean and uniform look.
Cut Away Extra Braiding Hair
- Carefully cut away any excess braiding hair at the bottom of your braid.
- Be sure to leave the curly human hair piece intact.
- This curly end adds the soft, boho texture you’re aiming for, creating a beautiful contrast against the rest of the braid.
Finishing Touches: Perfecting Your Boho Braids with Extra Care
After completing your boho braids, it’s time to add the final touches to make them look polished and ensure they stay in place throughout the day. Here’s how to complete your look:
- Setting Your Braids: Begin by applying a light mist of hair mousse or a mixture of water and conditioner over your braids. This will help to set your style and provide a subtle sheen. The conditioner adds moisture and helps keep the hair pliable without weighing it down. For those seeking an extra radiant finish, you can also use a Glow Shine Spray. This will give your braids a luminous effect, enhancing their natural beauty.
- Holding Everything in Place: To keep your braids intact and minimize flyaways, lightly spray a hairspray over your head. This will help set the style and keep everything in place, especially if you have layered or textured braids. Make sure not to use too much; a light mist will suffice to avoid stiffness in your hair.
- Styling Baby Hairs: To frame your face and add a touch of personality, leave out a small section of hair along your hairline these are your baby hairs. Use a thin comb and some edge control to carefully smooth these baby hairs down. This step is crucial as it not only helps in keeping the braids looking neat but also adds a soft and delicate touch to your overall hairstyle.
Style your baby hairs by creating cute swoops, swirls, or gentle waves around your face. This technique adds a polished, finished look to your braids, highlighting the boho texture and giving your hair a more voluminous appearance.
Maintenance Tips to Keep Your Boho Braids Looking Fresh
To ensure your boho braids stay looking fresh and beautiful throughout the day and night:
- Sleep with a Satin or Silk Bonnet: This will help to prevent frizz and tangles while you sleep. The smooth surface of the bonnet minimizes friction, keeping your braids in place and reducing the risk of them becoming frizzy overnight.
- Use Mousse to Detangle: If your braids start to get tangled, apply a small amount of mousse to gently detangle them. Mousse provides hold without adding weight, making it easier to work through the knots without damaging the braids.
- Spray Leave-In Conditioner Liberally: For stubborn tangles, spray a leave-in conditioner generously along your braids. Use your fingers to work through the conditioner, detangling gently. This will add moisture and make it easier to smooth out any tangles without pulling or damaging the hair.
- Reviving Flat-Looking Braids: To reactivate the curl pattern and revive flat braids, lightly dampen them with water. Then, gently scrunch your braids with your hands to encourage the curls to bounce back and regain their shape. This method will refresh your braids and restore their natural, boho texture.
Happy Braiding!
Creating your own boho braids at home can be a truly satisfying experience. It may take a bit of practice to perfect the technique, but the end result is definitely worth it a stunning, low-maintenance style that can last for weeks.
As you learn the ropes, be patient with yourself. Braiding can require some finesse, and it’s perfectly fine to take breaks if you need them. Don’t rush the process; embrace it as an opportunity to get creative and experiment with different looks.
And when it comes to achieving the best results, consider using Deep Wave Boho Braids Extensions they’ll add volume, texture, and the perfect boho touch to your hairstyle. With a little practice and the right tools, you’ll soon be able to enjoy a beautiful, effortlessly chic style right from the comfort of your own home!
and…
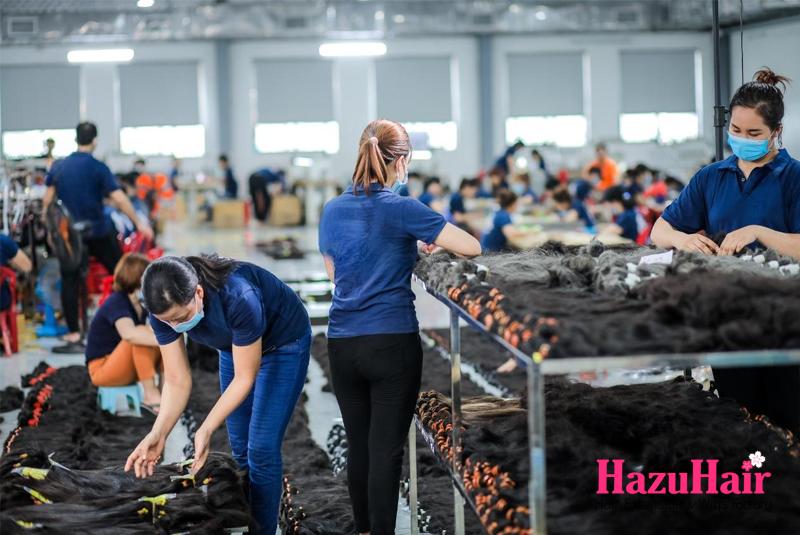
If you’re looking to buy high-quality wigs or hair extensions, look no further than HazuHair.
We are a trusted Vietnamese hair factory with over 100 skilled workers, offering a wide range of hair styles including wavy, curly, straight, kinky, and more.
Our products come in various colors such as natural black, ombre, blonde, red, pink, and many others.
Reach out to us today!
- Hair Factory: Tan Son 2 Village, Tan Dinh, Lang Giang, Bac Giang Province, Vietnam
- Hotline: +849 4949 3883
- Whatsapp Mrs ThanhLam: https://wa.me/84949493883
- Website: https://hazuhair.com