Hair knowledge
Switching Your Wig Up: How Many Ways to Braid It?
Hey everyone, it’s LaTaye! I’m back to help you look fabulous and feel empowered all year long.
Haven’t given up on your New Year’s resolutions yet? Good! Let’s keep the momentum going. You’re about to leave those haters in the dust, and you’ll look stunning doing it. This year, it’s time to shock the world with some amazing hairstyle transformations. Be fearless and experiment with new styles and rediscover those wigs you thought you were done with.
Wondering how to get the most out of your real human hair wigs? Braids are the answer! They’re a fantastic way to switch up your look without the hours-long salon appointments. Today, you can effortlessly achieve braided styles by purchasing a pre-braided wig or repurposing an existing one. I’ll share some tips on various braid techniques to elevate your wig game.
The key to stunning braided styles lies in starting with a clean and conditioned wig. No matter the braid pattern, clean hair is essential. I’ll guide you through a simple cleaning, conditioning, and drying routine to prepare your wig for a fabulous transformation.

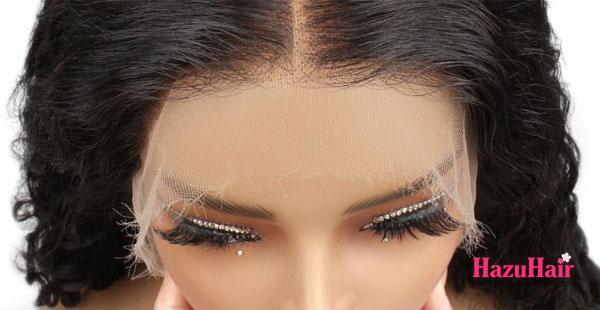
Cleaning Your Human Hair Wigs
To ensure your human hair wig remains luscious and vibrant, proper care is essential. Here’s a detailed guide on how to clean and maintain your wig:
Supplies:
- Straight Lace Front Wig
- Organix Coconut Shampoo (optional)
- Organix Coconut Conditioner
- Argan Oil
- Paddle Brush
- Towel
- Styrofoam Head
Pre-Wash Prep: Detangle Gently: Begin by detangling the wig using a paddle brush, starting from the ends and working your way up to the roots. This prevents hair breakage and makes the washing process smoother.
Washing Your Wig:
- Secure Your Wig: Pin your wig to a styrofoam head for easier handling.
- Wet Thoroughly: Use lukewarm water to wet the entire wig, ensuring all hair strands are saturated.
- Gentle Shampoo (Optional): If desired, apply a quarter-sized amount of shampoo to the crown of the wig. Avoid harsh shampoos that can strip the hair of its natural oils. Gently massage the shampoo into the hair, including the inside of the cap.
- Rinse Thoroughly: Rinse the shampoo out completely with lukewarm water.
- Condition Deeply: Apply a generous amount of conditioner to the wig, focusing on the ends. Massage the conditioner into the hair to ensure even distribution.
- Rinse Clean: Rinse the conditioner out thoroughly with lukewarm water.
- Gentle Drying: Wrap the wig in a towel to remove excess water. Avoid rubbing vigorously, as this can cause frizz and damage.
- Air Dry or Low Heat: Allow the wig to air dry naturally for optimal health. If you’re in a hurry, use a blow dryer on a low heat setting to speed up the process.
Post-Wash Care:
- Style with Care: Once your wig is completely dry, you can style it as desired. Use heat styling tools sparingly and always apply a heat protectant to prevent damage.
- Store Properly: When not in use, store your wig on a wig stand to maintain its shape and prevent tangling.

>>>Flat weft vs genius weft hair extensions: The hottest on hair extension fashion trends
Cleaning Your Synthetic Wigs
To keep your synthetic wig looking its best, it’s essential to clean it regularly. Here’s a simple guide to follow:
Supplies:
- Organix Coconut Water Shampoo & Conditioner
- Paddle Brush
- Styrofoam Head
- Towel
Cleaning Your Wig:
- Secure Your Wig: Pin your wig to a styrofoam head for easy handling.
- Cold Water Rinse: Wet the wig thoroughly with cold water. Avoid hot water, as it can damage the synthetic fibers.
- Gentle Shampoo: Apply a quarter-sized amount of wig-friendly shampoo to the wig. Gently massage the shampoo into the hair, including the inside of the cap.
- Thorough Rinse: Rinse the shampoo out completely with cold water. Gently squeeze out excess water.
- Conditioning Treatment: Apply a wig conditioner to the hair. This will help to detangle the fibers and keep the wig soft and manageable.
- Final Rinse: Rinse the conditioner out thoroughly with cold water. Gently squeeze out excess water.
- Gentle Brushing: Use a wide-tooth comb or a wig brush to gently detangle the wet wig, starting from the ends and working your way up to the roots.
- Air Dry: Allow the wig to air dry completely on the styrofoam head. Place a towel underneath to absorb any excess water.
Post-Wash Care:
- Avoid Heat: Avoid using heat styling tools on synthetic wigs, as this can damage the fibers.
- Store Properly: When not in use, store your wig on a wig stand to maintain its shape and prevent tangling.

Stitch Braid Your Frontal
A stitch-braided frontal is a fantastic way to elevate your wig game. This style offers versatility and a natural look. Here’s a detailed guide on how to achieve this look:
Supplies:
- Straight Lace Frontal
- Nude Wig Cap
- Eco-Style Gel
- Gorilla Snot Gel
- Pressed Powder
- Scissors
- Rattail Comb
- Hair Clips
- Styrofoam Head
- T-Pins
Preparing Your Frontal:
- Knot Bleaching: To create a more natural look, bleach the knots of your frontal for approximately 45 minutes.
- Plucking the Hairline: If your frontal isn’t pre-plucked, carefully pluck the hair along the hairline to create a realistic, less dense appearance. Use slanted tweezers to gradually remove excess hair, working in small sections. Remember, less is often more.
Applying the Frontal:
- Secure Your Wig: Pin your frontal to a styrofoam head for easier handling.
- Don the Wig Cap: Put on a nude wig cap, ensuring it’s pulled past your hairline. This will provide a smooth base for the frontal.

>>>Genius weft vs hand tied hair extensions: Which method is the most hair for you?
How to Apply Your Wig for a Flawless Finish
To achieve a seamless and natural look, follow these step-by-step instructions for applying your wig to your head:
- Step 1: Prepare the Wig Cap
Start by applying Got2B Ultra Hold Glue or Gorilla Snot adhesive to the top edge of your wig cap. Use a small amount and spread a thin, even layer across the cap’s surface near your hairline.
The glue should soak through to your hairline, ensuring a secure hold. This step helps anchor the wig cap to your head for a natural appearance.
- Step 2: Dry and Trim
Using a blow dryer on a low-heat setting, dry the adhesive until it becomes tacky and clear. Once the glue has dried, carefully trim off the excess material from the wig cap. Most of this will be the elastic headband portion of the cap. Ensure that the remaining cap covers your entire hairline smoothly, with no loose edges.
- Step 3: Blend with Pressed Powder
Take a makeup brush and apply pressed powder to the hairline area of the cap. Choose a shade that closely matches your skin tone for a natural effect. The powder helps to blend the cap with your skin, creating the illusion of a flawless scalp. Pay close attention to the edges for a seamless finish.
- Step 4: Apply Lace Glue and Position the Wig
Apply a second thin layer of lace glue along the cap’s hairline. Wait for it to become tacky, then carefully position your wig over the cap. Use a rattail comb with a metal tip to gently press the lace onto the glued area. This ensures the lace lays flat and blends perfectly with the cap.
- Step 5: Set the Wig
For a long-lasting hold, take your time smoothing the lace onto the cap. If needed, use the blow dryer again to dry the front and secure the bond. Alternatively, for an extra-smooth finish, tie a scarf snugly around your hairline. Leave the scarf on for about 20 minutes. This allows the adhesive to set properly and ensures the lace melts seamlessly into your skin.

Slaying the Perfect Look
Let’s dive into creating a flawless hairstyle! Follow these detailed steps to achieve a neat and polished look:
Step 1: Prep and Section Your Hair
Start by finding the center of your head and clipping the hair up to keep it out of the way. For this step, you may need an extra set of hands for assistance. Your helper can hold the lace frontal or wig in place while you work.
Step 2: Create the Initial Cornrows
On each side of the clipped-up section, create small, curved cornrows. Ensure they are neat and symmetrical. At this point, you should have two small braids on either side of the clipped section.
Step 3: Add the Center Braid
Next, part the middle section that was clipped up. Create a single small cornrow running straight down the center. Once completed, you should have the following structure:
- A braid on one side,
- Loose hair,
- A center braid,
- More loose hair,
- A braid on the opposite side.
Step 4: Define the Hairline
Part a thin section of hair along your hairline (from left to right) and leave it loose. You’re creating small “boxes” between these parts. Repeat this step on the opposite side of the center braid. The result should be evenly spaced sections along the front hairline.
Step 5: Apply Gel and Smooth
Take eco-style gel and apply it to the roots of the two sections on either side of the center braid. Smooth the gel into the roots and comb through the sections to ensure they’re sleek and tidy. Let these sections hang loosely over your face for now, creating a soft, face-framing effect.
Step 6: Secure Sections with Rubber Bands
For the remaining hair, continue parting it into small, even sections (as you did earlier). This time, secure each section with a rubber band to form neat, tiny segments. Aim for about 10–12 sections, but if your hair volume or style preference requires more, feel free to add additional sections.
Step 7: Perfect the Stitch Braid Look
The key to a stunning stitch braid is precision and neatness. Take your time to ensure each section is even and smooth. The final look should showcase clean lines, uniform parts, and symmetrical braids. If necessary, adjust the number of sections to achieve the desired aesthetic.
>>>Seamless genius weft hair extensions: Pro tips for look more natural and durable
Ready to Start Braiding!
Now that you’ve completed the horizontal sections, it’s time to braid everything together. Here’s how to proceed for a smooth and polished style:
Step 1: Begin Braiding the Horizontal Sections
Take the horizontal sections you’ve created and start braiding them straight back. Don’t worry about the sections you left loose at the front hairline yet we’ll address those in the next step.
Step 2: Smooth and Braid the Hairline
Apply a small dab of gel to the loose sections at the front hairline to create a sleek and smooth finish. Incorporate these sections into the horizontal braids as you continue braiding towards the back. This technique helps achieve a flawless hairline that blends seamlessly into the style.
Step 3: Secure the Braids
Once you’ve braided each side to the back, secure the ends with a rubber band to hold everything in place. Repeat the process for the other side, ensuring symmetry and neatness.
Step 4: Style Options
This braided foundation offers versatility, allowing you to wear the style in various ways:
- Topknot: Gather the braids into a high bun for a chic and stylish look.
- Sleek Ponytail: Pull the braids back into a low or mid-height ponytail for a clean, sophisticated appearance.
- Single Braid: Combine all the braids into one cohesive braid for a bold, elegant vibe.
- Full Front Braiding: If you prefer a more intricate look, continue the braid pattern and braid the entire front of the wig for a striking design.

Creating Individual Box Braids with a 360 Frontal
Follow these detailed steps to create stunning individual box braids using a 360 lace frontal and human hair bundles. Here’s everything you’ll need and a comprehensive guide to achieving the perfect braided look.
Supplies You’ll Need
- 360 Lace Frontal
- Straight Hair Bundle Deal (3 bundles in increasing lengths for a natural look)
- T-Pins
- Styrofoam Head
- Spandex Dome Cap
- Sewing Needle
- Nylon Thread
Step-by-Step Instructions
Preparation
- Attach the Lace Frontal: Secure the 360 lace frontal wig to the styrofoam head using T-pins.
- If your lace frontal is already attached to a wig, carefully detach it.
- If your frontal is separate, you can skip this detachment step.
- Position the Dome Cap: Place the spandex dome cap over the styrofoam head. Ensure it fits snugly and is positioned as it would sit on your actual head.
Creating the Base for Braiding
Step 1: Thread the Needle: Insert the nylon thread through your needle, leaving a long enough tail to tie securely.
Step 2: Secure the Thread to the Dome Cap
- Pull the needle through the dome cap, leaving two ends of the thread protruding.
- Cut the thread to ensure both ends are long enough to tie a double knot.
Step 3: Attach the Braiding Hair
- Take a section of your human braiding hair and place it evenly between the two ends of the thread on the dome cap.
- Tie the thread around the base of the braiding hair, securing it tightly with a double knot.
Step 4: Begin Braiding
- Use the traditional three-strand braiding technique to braid the hair down.
- To stabilize the base of the braid, use a T-pin to hold it in place on the styrofoam head. This prevents tugging and ensures consistency as you braid.
Step 5: Attach the Lace Frontal: Once you reach the crown of the dome cap, carefully attach the lace frontal. Use T-pins to hold it in place. Ensure the frontal aligns seamlessly with the braids you’ve created on the dome cap.
Step 6: Secure and Braid: Continue adding braiding hair and completing box braids over the entire frontal and dome cap, ensuring a natural and full appearance.
Tips for Efficiency and Comfort
- Pre-Thread Your Needles: Prepare several needles with nylon thread before starting. This allows you to work continuously and use the time for re-threading as short breaks.
- Flipping the Cap Edge: Flip the thicker edge of the spandex dome cap (the part that usually rests on your forehead) onto the top of the cap. This ensures a better fit and seamless blending with the frontal.
- Take Your Time: Precision is key when creating box braids. Use T-pins to stabilize your work and ensure each braid is uniform in size and tension.
Once all braids are complete, remove the wig from the styrofoam head and trim any stray hairs or threads. Style the braids into your desired look, whether it’s a sleek ponytail, topknot, or leaving them loose for a flowing, natural appearance.

>>>Differences of Genius Weft vs Machine Weft Hair Extensions – Which One Is Better?
Step-by-Step Guide to Sewing and Styling Your Lace Frontal Wig
Prepare the Frontal and Cap
- Position the Frontal
- Place your lace frontal on a styrofoam head with the dome cap secured.
- For accuracy, put the cap on your head first and mark the top of your ears with a white pencil. This ensures proper alignment.
- Align and Pin
- Position the frontal so the front edge of the lace aligns with the edge of the cap.
- The baby hairs should extend beyond the cap, not sit on it.
- Use T-pins to secure the frontal in place, pinning each side.
- Tie the Hair: Gather all the hair from the frontal and tie it up to keep it out of the way, allowing a clear view of the lace during sewing.
Sewing the Frontal
- Leave Extra Lace at the Ears: Ensure a small amount of lace extends at the ear areas. This prevents damage to the lace when sewing and provides a secure fit.
- Start Stitching
- Begin at one corner of the frontal, using the loop and pull method: Push the needle through the lace and cap, looping the thread and pulling it tightly to secure each stitch.
- Sew away from yourself, maintaining even tension and consistent spacing between stitches.
- Sew the Sides and Back
- Stitch both sides of the frontal first, ensuring the stitches are close together to avoid buckling.
- When sewing the back, gently pull the cap to eliminate any buckling and ensure a snug fit.
- Check and Adjust: Continuously inspect your work to ensure the frontal remains flat and aligned.
Braiding the Frontal
- Blend with Braiding Hair
- Divide the hair in the frontal into small sections.
- Braid each section, incorporating braiding hair to match the size and style of the braids at the back of the wig.
- Finalize the Frontal
- Once all sections are braided, ensure the baby hairs on the lace are visible.
- Decide whether to keep the lace intact or trim it.
- Style the baby hairs for a sleek finish.
Finishing Touches
- Seal the Braids: Dip the ends of the braids in hot water to seal them and prevent unraveling.
- Wear the Wig
- Put on a stocking cap to protect your natural hair.
- Use Extra Hold Lace Glue to secure the frontal to the stocking cap for a polished and natural look.
Pro Tips for Success
- Patience is Key: Sewing a lace frontal requires precision. Take your time to avoid errors.
- Keep Stitches Tight: Tight and close stitches ensure durability and prevent the frontal from shifting.
- Match the Braids: Consistent braid sizes between the frontal and the rest of the wig ensure a seamless look.
Top 5 Tips for Preparing Your Hair for a Wig
Before braiding your hair for a wig, follow these essential tips to ensure a smooth and natural look while keeping your hair healthy and protected.
Start with Clean, Dry Hair
Clean hair is easier to manage and braid, and it prevents buildup or residue that could lead to discomfort or scalp issues under the wig.
Pro Tip:
- Wash your hair with a clarifying shampoo to remove dirt and oil.
- Use a deep conditioner to moisturize your hair.
- Ensure your hair is completely dry before you begin braiding.
Detangle Thoroughly
Detangling reduces the risk of breakage and makes braiding easier and more comfortable.
Pro Tip:
- Use a wide-tooth comb or a detangling brush.
- Start detangling from the ends, working your way up to the roots.
- Take your time to remove all knots for smooth braids.
Part Hair Evenly
Uniform parts create a flatter, seamless braid base, which helps your wig lay naturally.
Pro Tip:
- Use a rat-tail comb to create straight, even parts.
- Smaller sections result in a flatter braid pattern, ideal for a more polished look.
Apply Moisturizing Products
Moisturizing keeps your hair healthy and prevents dryness or breakage while it’s under the wig.
Pro Tip:
- Use a leave-in conditioner or lightweight oil, focusing on the ends and scalp.
- Avoid heavy products that could cause buildup.
Secure Your Braids Properly
Properly securing the braids ensures they stay flat and provide a smooth surface for the wig.
Pro Tip:
- Use small, non-damaging hair ties or thread to tie off the ends.
- Tuck the ends of your braids under each other or pin them flat against your scalp to avoid lumps or bumps.

>>>Top 6 Types of Hair Extensions Hot Trends 2025
Wrapping Up Your New Style Options
These two braided styles for your wigs open up a world of versatility, allowing you to experiment with fresh looks and breathe new life into your collection. Whether you’re looking to update an old favorite or simply try something different, these styles make it easy to transform your wig into a brand-new fashion statement.
For anyone who’s tucked a wig away because it felt outdated or lacked inspiration, these ideas are a perfect solution. A simple braid can turn a forgotten piece into something stylish and exciting again. The beauty of wigs lies in their adaptability, and with these options, you can make the most of your investment.
Sharing these tips and ideas brings me so much joy, as my goal is to help you maximize the value and creativity of your wigs and extensions. Wigs aren’t just about convenience they’re a canvas for personal expression, and I’m here to help you explore all the possibilities.
I’d love to hear your thoughts! Comment below to share what you liked most about these braided styles or let me know what other wig-related topics or styling tips you’d like me to cover. Your feedback inspires me to bring you even more useful and exciting ideas!
and…

If you’re looking to buy high-quality wigs or hair extensions, look no further than HazuHair.
We are a trusted Vietnamese hair factory with over 100 skilled workers, offering a wide range of hair styles including wavy, curly, straight, kinky, and more.
Our products come in various colors such as natural black, ombre, blonde, red, pink, and many others.
Reach out to us today!
- Hair Factory: Tan Son 2 Village, Tan Dinh, Lang Giang, Bac Giang Province, Vietnam
- Hotline: +849 4949 3883
- Whatsapp Mrs ThanhLam: https://wa.me/84949493883
- Website: https://hazuhair.com