Hair knowledge
How to Install Deep Wave Closure Wigs for a Natural Look
Deep wave closure wigs are the ultimate choice for those seeking a luxurious, natural, and effortlessly glamorous look. These wigs are designed to provide a flawless finish, making them a popular option for beginners experimenting with hair styling and enthusiasts who regularly explore new styles.
One of the key benefits of deep wave closure wigs is their ability to blend seamlessly with your natural hairline, creating a realistic and polished appearance. Their carefully crafted design mimics the texture and flow of natural hair, ensuring a perfect match that enhances your beauty while offering versatility in styling.
Although the installation process for deep wave closure wigs is relatively straightforward, it does require a certain level of attention to detail, precision, and the right tools to ensure the wig is securely applied without compromising its natural look. Whether you’re a beginner or an experienced stylist, achieving a flawless result is possible with the right approach and techniques.
The detailed guide below provides a comprehensive, step-by-step installation process for deep wave closure wigs. It breaks down every stage of the application, from preparation to finishing touches, ensuring you can achieve a seamless and natural appearance. Additionally, you will find expert tips and insights to help you maximize the wig’s potential, keep it in pristine condition, and enjoy a stunning, effortlessly natural hairstyle.
Deep Wave Closure Wigs
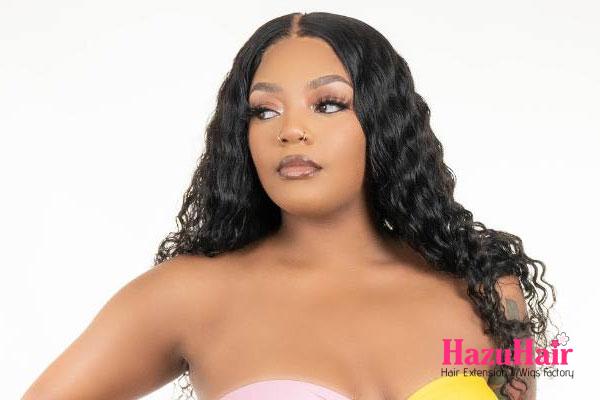
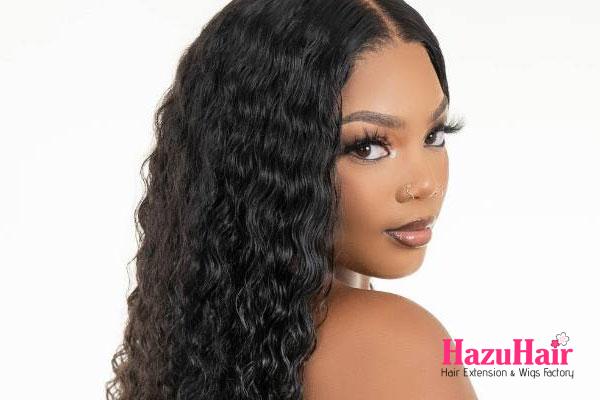
Deep wave closure wigs are a popular choice for those seeking versatile, voluminous, and effortlessly stylish hair. These wigs feature a lace closure, a unique component that perfectly mimics the natural scalp and hairline, ensuring a seamless and realistic appearance. By blending naturally with your hair, deep wave closure wigs provide a polished and sophisticated look suitable for any occasion.
The term “deep wave hair” refers to the wig’s distinct texture, which is characterized by large, defined waves that create an elegant and bouncy appearance. These waves add volume, movement, and depth to the hair, making them ideal for individuals looking to achieve a full-bodied, glamorous hairstyle without the need for constant styling. The deep wave texture exudes a natural yet luxurious vibe, giving you the best of both worlds.
Deep wave closure wigs can be made from two types of materials: human hair and synthetic hair.
- Human hair deep wave wigs are crafted using 100% real human hair, offering unmatched softness, shine, and durability. They can be styled, dyed, and treated just like natural hair, making them a long-term investment for those who want versatility and longevity.
- Synthetic deep wave wigs, on the other hand, are more affordable and low-maintenance options. These wigs are pre-styled, retain their deep wave pattern over time, and are perfect for individuals who want a budget-friendly and ready-to-wear hairstyle.
What makes deep wave closure wigs stand out is the lace closure. This feature plays a significant role in achieving a realistic and natural appearance. The lace closure is installed at the top of the wig to cover the crown area, perfectly mimicking the scalp and hairline. This allows for a smooth and natural transition, ensuring that the wig blends seamlessly with your natural hair and skin tone.
The popularity of deep wave closure wigs can be attributed to their stylish appeal, versatility, and ease of installation. Whether you’re a beginner exploring wigs for the first time or a seasoned hair enthusiast, these wigs are designed to be user-friendly and adaptable. They can be worn for everyday use, special events, or protective styling, helping you achieve a flawless and professional look without spending hours in a salon.
Overall, deep wave closure wigs are an excellent choice for anyone looking to enhance their appearance with a natural, voluminous hairstyle. With their defined waves, realistic lace closures, and availability in both human and synthetic hair options, these wigs continue to be a top choice for women seeking beauty, convenience, and confidence.

>>>Aftercare Tips for Your Hair Extensions
Detailed Installation Method for Deep Wave Closure Wigs
Installing a deep wave closure wig involves careful preparation and the proper use of tools to achieve a secure and natural-looking finish. Below is a detailed step-by-step guide to help you complete the process seamlessly.
Gather the Necessary Materials
Before beginning the installation process, it’s crucial to have all the required tools and products readily available. A smooth installation depends on proper preparation. Here is a list of essentials you will need:
- Deep Wave Closure Wig: Choose a high-quality wig that matches your desired style and fits comfortably. The deep wave pattern should be well-defined and natural-looking.
- Wig Cap: A wig cap helps protect your natural hair while providing a smooth, flat surface for the wig installation.
- Wig Glue or Adhesive: Use a strong and skin-safe wig glue or adhesive to ensure the closure wig remains securely in place throughout the day. For sensitive skin, opt for hypoallergenic adhesives.
- Hair Clips or Bobby Pins: These will help section your hair and hold parts of the wig in place during installation.
- Scissors: A pair of sharp scissors will be used to trim the wig lace or adjust the wig cap to your desired fit.
- Tweezers: Tweezers are essential for plucking the hairline of the closure wig, which creates a more natural, realistic appearance.
- Edge Control Gel: Edge control gel helps smooth down and style the baby hairs around your hairline for a polished and seamless finish.
- Hairbrush or Comb: Use a brush or wide-tooth comb to detangle and style the deep wave closure wig without disturbing the curl pattern.
Preparing the Natural Hair for a Deep Wave Closure Wig
Proper preparation of your natural hair is essential to ensure a smooth installation and a natural look for your deep wave closure wig. Follow these detailed steps to achieve a clean, flat base and protect your hair during the process.
Step 1: Cleanse and Condition
Start by thoroughly cleaning your natural hair. Use a sulfate-free shampoo to remove dirt, oils, and product buildup while maintaining your hair’s natural moisture. After washing, apply a hydrating conditioner to soften the hair and prevent frizz. Conditioning is crucial because it restores moisture, making the hair manageable and smooth. Allow the conditioner to sit for a few minutes before rinsing it out completely.
Step 2: Dry the Hair
Ensure your hair is completely dry before proceeding. You can let it air dry naturally to avoid heat damage, or use a blow dryer on a low heat setting for quicker results. Hair that is damp can cause scalp irritation and mold when covered for long periods, so dryness is key.
Step 3: Flatten the Hair
To create a flat, smooth foundation for your wig, choose one of the following methods:
- Flat Ironing: For short to medium-length hair, use a heat protectant and straighten the hair as close to the scalp as possible.
- Braiding: For longer hair, section it into small, tight braids (cornrows work best). Braids help prevent bulkiness and bumps under the wig, ensuring a seamless look.
Step 4: Use a Wig Cap
Finally, cover your hair with a wig cap to protect it and secure the flat base. The cap keeps stray hairs in place and acts as a barrier between your natural hair and the wig adhesive.
With clean, conditioned, and flattened hair, your deep wave closure wig will sit naturally and comfortably for a flawless finish.

>>>How to Make Your Hair Extensions Last
Necessary Customization of the Wig
To achieve a seamless and natural look with your deep wave closure wig, some necessary customizations should be made before installation.
- Step 1: Adjust the Wig Cap
Begin by adjusting the wig cap to fit your scalp comfortably. Use the adjustable straps or hooks located inside the cap to tighten or loosen it according to your head size. A secure fit ensures comfort and prevents the wig from shifting during wear.
- Step 2: Trim the Excess Lace
If the wig has extra lace extending past the hairline, carefully trim it. Use a pair of sharp scissors to cut the lace as close to the natural hairline as possible without cutting into the hair. For a cleaner look, trim in small sections, following the curve of the hairline. This step helps the wig blend naturally along the forehead.
- Step 3: Tint the Lace
To match the lace to your skin tone for a flawless blend, tinting may be necessary. Use a lace tint spray or a foundation that matches your complexion. Gently apply the tint to the underside of the lace, ensuring even coverage. Let it dry completely before proceeding. Proper tinting eliminates the contrast between the lace and your scalp, making the wig appear more natural.
- Step 4: Pluck the Hairline
Deep wave closure wigs often come with a dense hairline, which can look unnatural. Use tweezers to carefully pluck individual strands from the hairline, thinning it out for a more realistic transition. Focus on creating a slightly uneven, natural look but avoid over-plucking, which can create bald spots.
Installation of the Wig
The installation of your deep wave closure wig involves several steps to ensure it fits securely and looks natural. Follow these detailed instructions to achieve a flawless installation.
- Step 1: Positioning the Wig
Start by placing your deep wave closure wig on your head. Position it carefully to align it with your natural hairline. This is crucial for a seamless look and to avoid any visible gaps between your natural hair and the wig. Adjust the wig as needed to find the perfect placement, ensuring it feels comfortable and secure.
- Step 2: Securing the Wig Temporarily
Once the wig is in place, use hair clips or pins to hold it temporarily. This will keep it from shifting while you apply the adhesive. Place the clips or pins strategically around the perimeter of the wig to maintain its position and prevent movement. This step allows you to make any necessary adjustments before final attachment.
- Step 3: Applying the Adhesive
To secure the wig in place, apply a medium amount of wig glue around the hairline. Be cautious not to use too much glue, as this can lead to skin irritation or damage to your natural hair. Spread the glue evenly with a spatula or the back of a brush. Ensure that the glue is distributed smoothly along the perimeter of the wig’s lace closure.
- Step 4: Attaching the Lace
Once the glue is evenly applied, carefully place the lace of your wig’s closure onto the adhesive. Press down gently but firmly to adhere it to the scalp. Use a comb to smooth out any wrinkles and ensure the lace is securely attached. This step helps to firmly fix the wig in place and achieve a seamless blend with your natural hairline.
- Step 5: Final Adjustments
After pressing down the lace, give the adhesive a few minutes to dry and set. During this time, avoid touching the glued area to prevent lifting the lace. Once it’s secure, go over the edges with a comb to make sure they are neatly tucked in. This final adjustment ensures the wig stays in place throughout the day and looks natural from every angle.
>>>Top 7 Tips for Hair Extension Care at Home
Hairline Blending
To achieve a natural, seamless look with your deep wave closure wig, blending the hairline with your scalp is crucial. One effective method is to use a foundation or concealer that matches your skin tone. Applying this product to the lace of the wig will help to create a flawless transition between the wig and your natural scalp.
This step not only enhances the overall look but also makes the wig appear as though it’s growing directly from your scalp. Carefully blend the foundation or concealer by gently dabbing it onto the lace using a makeup sponge or brush. This technique softens the edges and ensures the wig blends naturally with your complexion.
After applying the foundation or concealer, trim any excess lace from around the hairline using scissors. Be very careful not to cut the actual hair strands only the lace. It’s essential to maintain the natural shape and fullness of the wig while removing excess material. Once the lace is trimmed, your deep wave closure wig is ready for styling according to your preferences. You can use various tools such as a curling iron or flat iron to enhance the wave pattern of the hair, giving it more volume and definition.
Final Touches
To provide additional security and prevent the wig from lifting throughout the day, consider adding wig tape or adhesive strips along the edges of the wig cap. These strips are discreet and effective in holding the wig securely in place.
Applying wig tape or adhesive strips will help prevent any discomfort and ensure the wig stays in place during regular wear. If you notice any areas of the wig lifting, simply apply a small amount of glue to those spots and press them down gently. This simple fix will help maintain the wig’s stability and prevent any embarrassing situations.
Adjusting the hair parting dimensions can also be done with ease using a flat iron. This allows you to customize the wig to suit your desired style. Whether you prefer a middle part, side part, or a deep wave look, a flat iron can help you achieve the perfect placement for your wig. These final touches will make your deep wave closure wig not only blend seamlessly with your natural hair but also allow you to express your personal style with confidence.

Tips for a Natural Look
For hair styling enthusiasts who want their deep wave closure wigs to maintain a natural appearance, it’s important to follow certain key tips. These tips will help ensure that your wig looks and feels as natural as possible, enhancing your overall style and confidence.
- Adjusting the Fit
After wearing the wig, make sure it fits your head size perfectly. Utilize adjustable straps or bands to achieve the right fit. If these aren’t sufficient, consider using wig clips for added security. This will prevent any shifting or discomfort and ensure that the wig sits comfortably on your head throughout the day. A well-fitted wig is crucial for achieving a seamless, natural look.
- Clean and Dry Natural Hair Base
It’s important to always install your deep wave lace front wigs or closure wigs on clean and dried natural hair. This provides a flat and smooth base for the wig, preventing any bumps or unnatural lumps. Start by washing your natural hair with a sulfate-free shampoo and conditioning it with a gentle conditioner to build up its moisture.
After conditioning, let your hair air dry completely. Once your natural hair is fully dry, create a flat base by either using a flat iron to smooth out your hair or making small, tight braids that are properly secured. This preparation will ensure that the wig lays flat against your scalp and provides a natural, undetectable appearance.
- Customization Needs
Before installing your wig, check its customization needs. Trim any excess lace from the wig’s perimeter carefully. Be cautious not to cut the actual hair strands just the lace. You may also need to tint the lace to match your skin tone for a seamless blend. Applying a foundation or concealer that matches your complexion to the lace can help in this regard.
Additionally, gently pluck the hairline of the wig to blend it more naturally with your natural hairline. Plucking too much can make the wig look sparse, so be mindful of the quantity. This customization process will significantly enhance the natural appearance of your deep wave closure wig.
- Matching Lace to Skin Tone
If your lace does not match your skin tone perfectly, applying foundation or concealer that matches your complexion will make a big difference. Use a makeup sponge or brush to blend the product into the lace gently. This will create a seamless transition between your scalp and the wig, making it look more natural. The key is to apply the product evenly and blend it well, ensuring there are no harsh lines.
- Proper Securing
Properly securing the wig is crucial for achieving a natural look. Use high-quality glue from reputable stores, such as HazuHair Extensions, to ensure a secure fit. Apply the glue carefully around the perimeter of the wig’s lace closure.
Spread the glue evenly to avoid clumps or excess buildup, which can be visible or irritating to the skin. Once applied, press the lace of the wig onto the adhesive and smooth it down with a comb. This will ensure that the wig is securely held in place and won’t shift or lift during wear.
- Regular Care and Maintenance
To preserve the natural look of your deep wave closure wig, regular care and maintenance are essential. Wash and condition the wig regularly to keep the hair soft, manageable, and free from tangles. Use a sulfate-free shampoo and a moisturizing conditioner to maintain the wig’s natural texture and sheen.
After washing, allow the wig to air dry on a wig stand to maintain its shape and prevent tangling. Store your wig in a cool, dry place when not in use, preferably on a wig stand to keep its shape intact. This practice will also prevent any damage from humidity or heat, which can affect the wig’s texture and appearance.
>>>How to Wash and Prep Your Hair Extensions
Seamless Deep Wave Closure Wigs Installation
The installation process of a deep wave closure wig requires meticulous planning, customization, and attention to detail to achieve a natural appearance. By following a detailed step-by-step guide, which includes everything from natural hair preparation to personalized wig fitting and final installation, one can quickly achieve a smooth and realistic look.
To maintain the wig’s natural appearance, it’s crucial to make the right alterations, such as tinting the lace, gently plucking the hairline, and using the appropriate glue. These steps are vital to ensure that the wig blends seamlessly with your natural hairline, making it difficult to distinguish between the two.
Routine maintenance is also essential for extending the lifespan of the wig and maintaining its continuous natural look. Regular cleaning with sulfate-free products, conditioning to keep the hair soft and manageable, and proper storage ideally on a wig stand are necessary to prevent tangling and damage. At HazuHair Extensions, you can find high-quality deep wave closure wigs at an affordable price, ensuring that you not only achieve a natural look but also enjoy the longevity and comfort of your wig.
and…

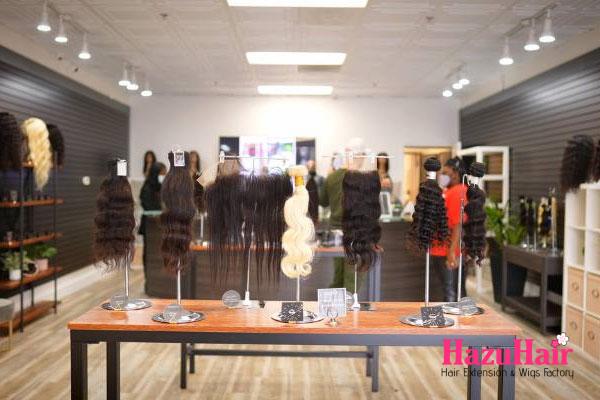
If you’re looking to buy high-quality wigs or hair extensions, look no further than HazuHair.
We are a trusted Vietnamese hair factory with over 100 skilled workers, offering a wide range of hair styles including wavy, curly, straight, kinky, and more.
Our products come in various colors such as natural black, ombre, blonde, red, pink, and many others.
Reach out to us today!
- Hair Factory: Tan Son 2 Village, Tan Dinh, Lang Giang, Bac Giang Province, Vietnam
- Hotline: +849 4949 3883
- Whatsapp Mrs ThanhLam: https://wa.me/84949493883
- Website: https://hazuhair.com