Hair knowledge
Stop Throwing Them Away! Ways to Recycle Your Old Hair Extensions
If you’re anything like me and love experimenting with human hair bundles, you’ve probably found yourself surrounded by leftover hair, unsure of what to do with it. Stop giving up on your extensions, thinking they’re beyond saving.
I’ve had those moments too ready to toss them out when, in reality, the hair still had plenty of life left, and I just didn’t realize the endless possibilities for reviving and reusing it.
Now, don’t get me wrong some hair is beyond repair. But too often, I’ve seen extensions that could be salvaged with a little effort, saving us both money and waste. All it takes is knowing the proper steps and alternatives, like how to recycle and repurpose them.
Before diving into the options, the first step in recycling your old tracks is revival bringing your extensions back to life!

Reviving Your Extensions
We often avoid attempting to bring our extensions back to life because we think it’s impossible. Common reasons we give up on extensions include dryness, shedding, or dullness. But honestly, the only time extensions should be tossed is if they’re shedding excessively or if the hair quality is poor.
Dryness and lack of shine can be addressed with specialized hair care products designed to restore the beauty of your weaves and make them reusable. We’ll dive into those tips later.
For now, don’t worry! I’m going to show you how to properly wash your extensions, a crucial step in bringing them back to life. There are several ways to wash your bundles, but the most important rule to remember is this: always condition first, then wash. Yes, you read that right condition first, then wash!
Proper Washing Technique
To wash your extensions properly, start with conditioning. The reason for this is that hair bundles can become heavy, so you never want to overload them with oils. This concept applies to the washing process as well. By conditioning first, you provide the hair with the nutrients it needs.
After conditioning, the nutrients that soften your extensions remain, but the weight of the conditioner is removed when you wash. If you were to wash first and then condition, the conditioner wouldn’t be as effective at removing the excess weight left by the shampoo.
For an extra boost, you can perform two conditioning treatments and two washes. Alternatively, if you’re looking to truly revive your extensions, try boiling them!
Yes, you read that right bring a pot of water and conditioner to a boil on low heat, and let your tracks simmer for 20-25 minutes. This process helps restore the body and bounce to your bundles. Once done, wash them again and let them air dry.
If you’re short on time, simply follow the conditioning and washing routine to keep your extensions in great shape.

Products to Restore Your Extensions
Believe it or not, there are specialized products designed to help care for your hair extensions. If your extensions are made from 100% human hair, you can use the right products to restore their quality and make them last longer!
Many of us unknowingly use shampoos with sulfates and parabens, which strip the natural oils from the hair, causing split ends and premature damage. To avoid this, try using a sulfate-free shampoo.
Take some time to research shampoos and conditioners that are specifically formulated for human hair extensions to ensure you’re giving your bundles the best care possible.
Nutrient-Rich Products
Products containing ingredients like Vitamin E, argan oil, wheat protein, and tea tree oil are excellent for nourishing your extensions without weighing them down after a good wash.
Consider using organic shampoos and conditioners, such as a coconut milk conditioner treatment, for a deep, nourishing cleanse.
After your first use of these nutrient-packed products, you’ll definitely notice the difference!
If you’re looking to add moisture to your tracks after shampooing and conditioning, take some time to research products that match the style you’re aiming for.
Repurposing Your Frontals into Closures
After wearing your lace frontal multiple times, it can start to feel like it’s seen better days. The lace may have stretched, or the hair could be losing its luster. At this point, you might be thinking it’s time to toss it out. But before you do that, have you considered giving your frontal a second life?
If your frontal has become worn out, there’s an easy and creative way to repurpose it into a chic lace closure! This transformation not only saves you money but also adds a new dimension to your wig styling game.
Here’s how you can do it: Start by placing your frontal on a mannequin head. Secure it with pins to keep it steady. Next, decide how wide you want your closure to be, then part the lace accordingly. Once you’ve got the part where you want it, carefully cut along the parting. And just like that, you’ve turned your old frontal into a stylish, functional lace closure!
This simple transformation is a game changer when you want to refresh your look without having to buy a new closure. And, let’s face it who doesn’t love a little DIY magic? You probably didn’t think of this trick before, but trust me, it’s going to open up a whole new world of possibilities for your wigs and extensions!

Transforming Old Extensions into Clip-ins
Sometimes, your natural hair needs a break after wearing weave continuously, and one common concern I hear is about the lack of volume in clients’ real hair. If you’re looking to add more volume and fullness while maintaining a natural look, clip-in extensions are a fantastic option.
The great news is that you can turn your old hair extensions into clip-ins! It’s easier than you might think. All you need are some clips, which you can easily find at your local beauty supply store, and a little creativity.
Simply purchase the clips and attach them to the wefts of your old extensions. You can cut the extensions into smaller sections to customize the look and add as much volume as you desire. This DIY project will not only give your hair the boost it needs, but it’s also a great way to recycle your old extensions and extend their lifespan!
With clip-ins, you get the best of both worlds: extra volume and a realistic, seamless blend with your natural hair. So next time you’re looking for more fullness, don’t toss your old extensions repurpose them into clip-ins!
Supplies You’ll Need:
- Hair Clips
- Thread (either hair thread or regular clothing thread)
- Needle
Once you’ve washed your old tracks (as discussed earlier), it’s time to cut them into the desired widths to add volume to your hair.
To add volume to the back of your hair, take one of the old track pieces and measure it from one side of your head to the other to determine the length. This will ensure you get a good fit for the area you want to enhance.
Next, take your clip-in pieces. You’ll notice that they have holes at the top. These are where you’ll attach the tracks using thread. Simply thread your needle and sew the track onto the clip, ensuring it’s securely fastened.
The number of clips you’ll need for each track will depend on the width of the track itself. Ideally, you’ll want to place a clip at both ends of the extension for stability. If the track is wider, you may need to add one or two more clips in the middle to ensure a secure fit.
Steps to Follow
Here’s a simple guide on how to properly secure your track to the clip:
- Step 1: Threading Your Needle
Start by threading your needle with a piece of thread. Measure the thread to about the length of your arm, and double knot the ends to prevent it from unraveling.
- Step 2: Sewing the Track to the Clip
Take your clip and place it at one end of the track. Hold the clip and track together, then use your needle to poke through the track and into the hole at the top of the clip.
To secure the track, run the thread through the hole multiple times, making sure it’s tightly fastened before moving on to the next hole. Continue this process around the clip, sewing it securely onto the track.
- Step 3: Securing the Thread
Once the entire clip is sewn onto the track, cut the excess thread and tie a triple knot to ensure it stays in place. This extra knot will prevent the thread from coming undone.
With your clip-ins ready, you can now add that sexy, voluptuous volume to your hair, perfect for a glamorous night out or whenever you need to boost your look!

Color Your Extensions
If your old extensions are not chemically treated or colored, now is the perfect time to experiment with color! Once your extensions have air-dried, you can unleash your creativity and play with vibrant shades. Whether you want to go blonde, red, or try something bold like blue, pink, or purple, the possibilities are endless.
Bleaching Your Extensions
Start by bleaching your extensions to achieve the desired color. Keep in mind, the higher the developer volume you use, the more the hair will lift and lighten. It’s crucial to know the quality and grade of your extensions, as this will affect how the color turns out.
If you’re feeling adventurous, you can also try an ombré look. Simply color your clip-ins and add them to your hair, giving you a pop of color without altering your natural hair with chemicals.
Even if you’re usually not into bold colors, why not give it a shot? You can even create a colorful human hair wig using your old extensions. This way, you can experiment with a new look without committing to permanent color. Plus, you can wear it whenever you’re ready for a change!
This brings me to my next exciting topic…
Worry-Free Wigs
Glueless wigs are a total game-changer, offering convenience and style every day. What’s not to love about a great wig? The best part is you can easily put them on and take them off, so there’s no need to sleep in them. Plus, if you create multiple wigs, you get to choose which one fits your mood and needs for the day.
With wigs, your styling options are virtually limitless. But right now, I’m going to show you how to quickly make a custom wig using your old hair extensions.
Here’s what you’ll need to create your own wig, all of which can be found at your local beauty supply store:
- Adjustable dome cap with straps
- Thread
- Needle
- Scissors
- Stick pins
- Mannequin head
- Hair ties
With these simple supplies, you’ll be well on your way to creating a versatile, easy-to-wear wig that can completely change your look!
Steps to Constructing Your Wig
- Step #1: Positioning the Closure or Frontal
Start by placing your mannequin head directly in front of you. Without adjusting it, position the dome cap on the head. Next, place your frontal or closure in your desired position on the dome cap and secure it with stick pins. Be sure to sew along the perimeter of the closure or frontal, avoiding sewing on the lace at the front.
- Step #2: Sewing the Hair
Now, apply the same techniques you would use for a regular sew-in by sewing the hair onto the dome cap. Start from the bottom and work your way up, sewing the tracks in until they meet the closure or frontal.
- Step #3: Checking Your Wig
Once the hair is sewn in, cut off any excess dome cap beneath the closure or frontal. Try the wig on to check the fit. If it feels too loose, use the adjustable straps on the dome cap for a more secure fit. Once satisfied, you can proceed to style your wig as desired.
Now that you know how to turn your old extensions into a stylish wig, you can enjoy a fresh look without worrying about the extensions becoming worn out. The best part is that you can wear your custom wig whenever you like!

Hair Gadgets Made from Hair
It may sound unusual, but hear me out there are so many creative ways to repurpose your old hair extensions into unique hair gadgets!
From hair bows to hairbrushes, the possibilities are endless when you start thinking outside the box. Here’s how you can turn your old extensions into stylish accessories:
- Hair Bows and Headbands from Old Extensions
Why not transform those old tracks into a chic hair bow? Simply shape the hair into a bow and secure it to a hair clip with hot glue. This accessory will easily elevate your ponytail or bun!
For a more intricate look, you can make a braided headband using your extensions. Start with a basic stretchy headband, which will act as your base. Braid your extensions onto the headband and use a glue gun to secure the braid in place. Wrap the braid around the headband, gluing it as you go.
You’ve got yourself a new, realistic hair headband that can beautifully complement an elegant bun or a timeless ponytail.
- Hair Rat Volumizer with Old Extensions
One creative way to repurpose your old hair extensions is by making a “hair rat”—a volumizing tool used to add height and fullness to your hairstyle. This simple creation is essentially a large ball of hair that helps lift and shape hair when brushed upward, giving your look an extra boost of volume.
- Clip-in Bangs with Old Extensions
Another fantastic way to recycle your extensions is by turning them into clip-in bangs. We’ve already covered how to create clip-ins, but this time, you’ll cut the extensions into a manageable bang shape that you can easily attach whenever you’re in the mood for a fierce, stylish look. It’s an effortless way to switch up your hairstyle without the commitment—how simple is that?
Donations
If you’ve tried everything and still find no use for your old extensions, consider donating them! Many charitable organizations accept 100% human hair donations and will gladly repurpose your extensions for people in need. A quick online search will help you find resources and instructions for donating. You’ll be making a meaningful impact by giving your hair a second life while helping someone else in need.

Inspiration to Recycle
I hope this post has inspired you to think twice before tossing out your old bundles or letting them gather dust in a drawer. Your old hair extensions still have plenty of life left in them!
As I’ve mentioned, the only real reason to dispose of hair extensions is if they’re severely shedding, damaged by color treatments, or simply of poor quality. Other than that, there’s so much potential in repurposing them.
By now, you’re probably starting to realize the many creative ways you can recycle your old hair extensions, and trust me, it’s a game-changer! Reflecting on past experiences, I wish I’d kept some of those gorgeous extensions instead of throwing them away. It’s time to stop being wasteful and start using those extensions to their full potential.
Even if you no longer wear them yourself, you may have a friend who would love a quick wig or stylish hair accessory. Plus, you could become the go-to person in your circle for transforming old extensions into something fresh and fabulous.
Who knows, you could even master the art of revamping old tracks, and your friends might start asking you to work your magic on their worn-out extensions too! There are endless possibilities once you start exploring how to breathe new life into those hair pieces.
Do some research, get creative, and the opportunities to revive your extensions are limitless. Don’t let them go to waste make the most of what you’ve got.
Now, I’d love to hear from you how are you planning to recycle your extensions? Share your ideas in the comments below and spread the word! Let’s turn old extensions into something extraordinary!
and…
If you’re looking to buy high-quality wigs or hair extensions, look no further than HazuHair.
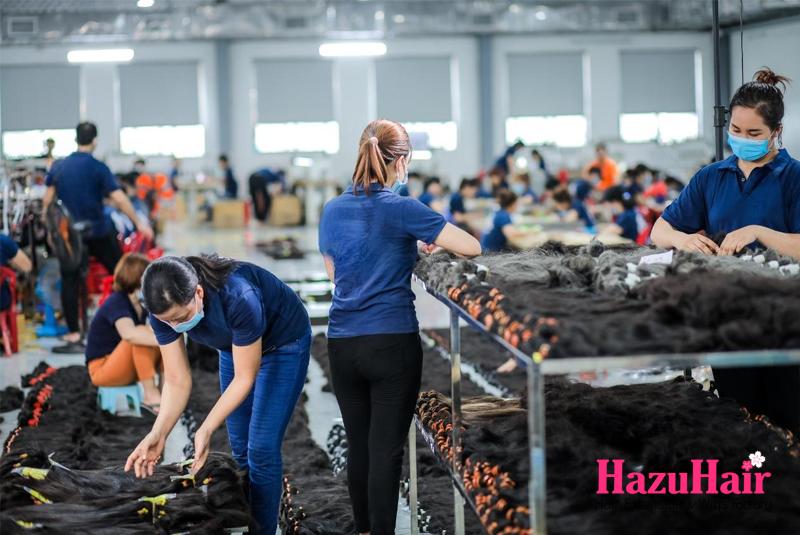
We are a trusted Vietnamese hair factory with over 100 skilled workers, offering a wide range of hair styles including wavy, curly, straight, kinky, and more.
Our products come in various colors such as natural black, ombre, blonde, red, pink, and many others.
Reach out to us today!
- Hair Factory: Tan Son 2 Village, Tan Dinh, Lang Giang, Bac Giang Province, Vietnam
- Hotline: +849 4949 3883
- Whatsapp Mrs ThanhLam: https://wa.me/84949493883
- Website: https://hazuhair.com